HoudiniEsq Document Management
Document Management
Artifact Production and Management
Introduction
Document management, often referred to as Document Management Systems (DMS), is the use of a computer system and software to store, manage and track electronic documents and electronic images of paper-based information captured through the use of a document scanner.
Use Case
Manage project, matter and contact artifacts of any nature; documents, contracts, notes, email, email attachments, images, audio, video, and Custom Records. Robust User Access Controls and Rules keep private data private.
Artifacts containing textual information are full text indexed, searchable, classified, organized and sharable in milliseconds.
Generate collections of documents from one or more templates at a button press or autonomously.
Work from within Word, Outlook, Office365, WordPerfect, or Acrobat. Track, bill, and invoice for your time. Use the Client Portal to securely share artifacts with parties or co-counsel. You determine what is shared and for how long. Use workflow and document automation to create draft briefs, contracts, complaints, send letters, file memorandums, and more. Workflow reduces cost and user errors. No programing or scripting required to automate your workflow in HoudiniEsq’s DMS.

Quick Start
Step 1 To view select a project or matter.
Step 2 Click the selected project/matter’s Docs tab
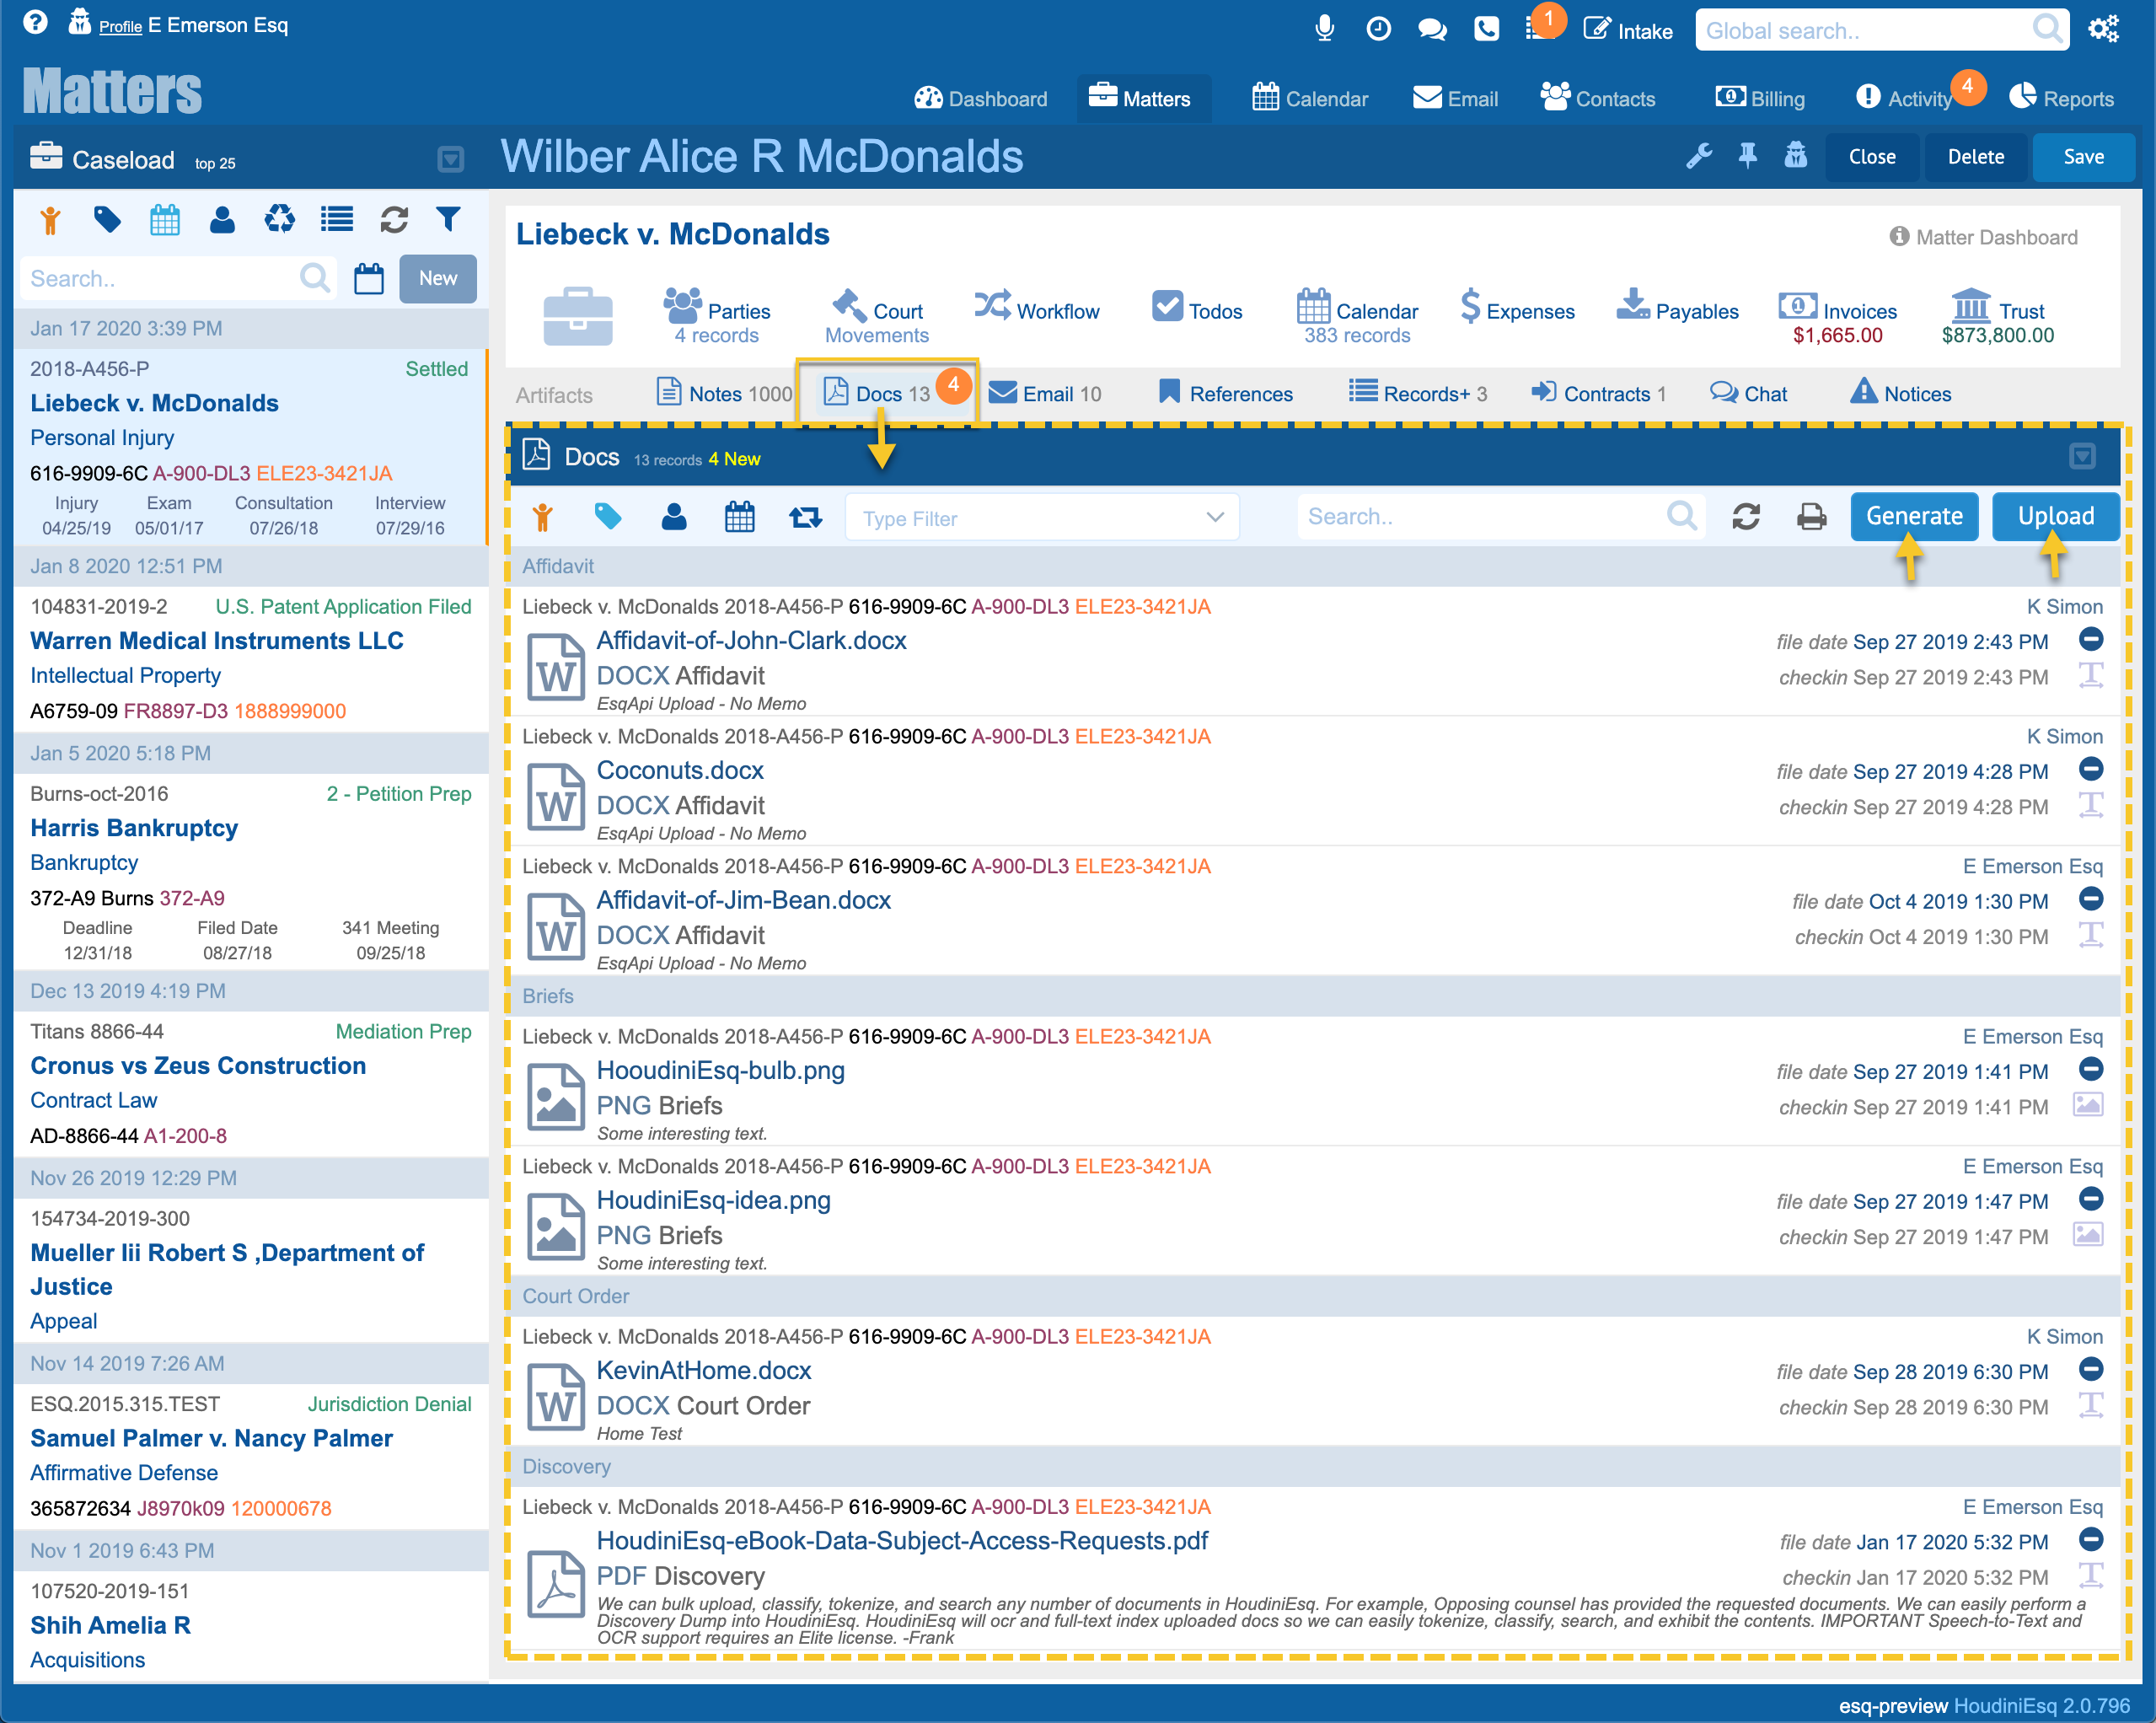
Step 3 Filter, Group, Search, upload, or Generate artifacts.
You can manage documents under Matters, Projects, and Contacts. Managing your artifacts such as documents, email, and email attachments is easy. Under any project, matter or contact record is a Docs tab.
Use the “My Data Icon” to toggle the list to display records belonging to you. Otherwise, the list defaults to displaying all records you are privy to. You can group records by Type, Staff, or Date. Filter and search with search highlighting.
1. To generate a document from a template click Generate.
2. To uploads one or more documents click upload.
3. To view or download a document double-click any item in the list.
The image below depicts the Docs tab of the selected Matter Record.
Uploading Documents
Uploading Documents
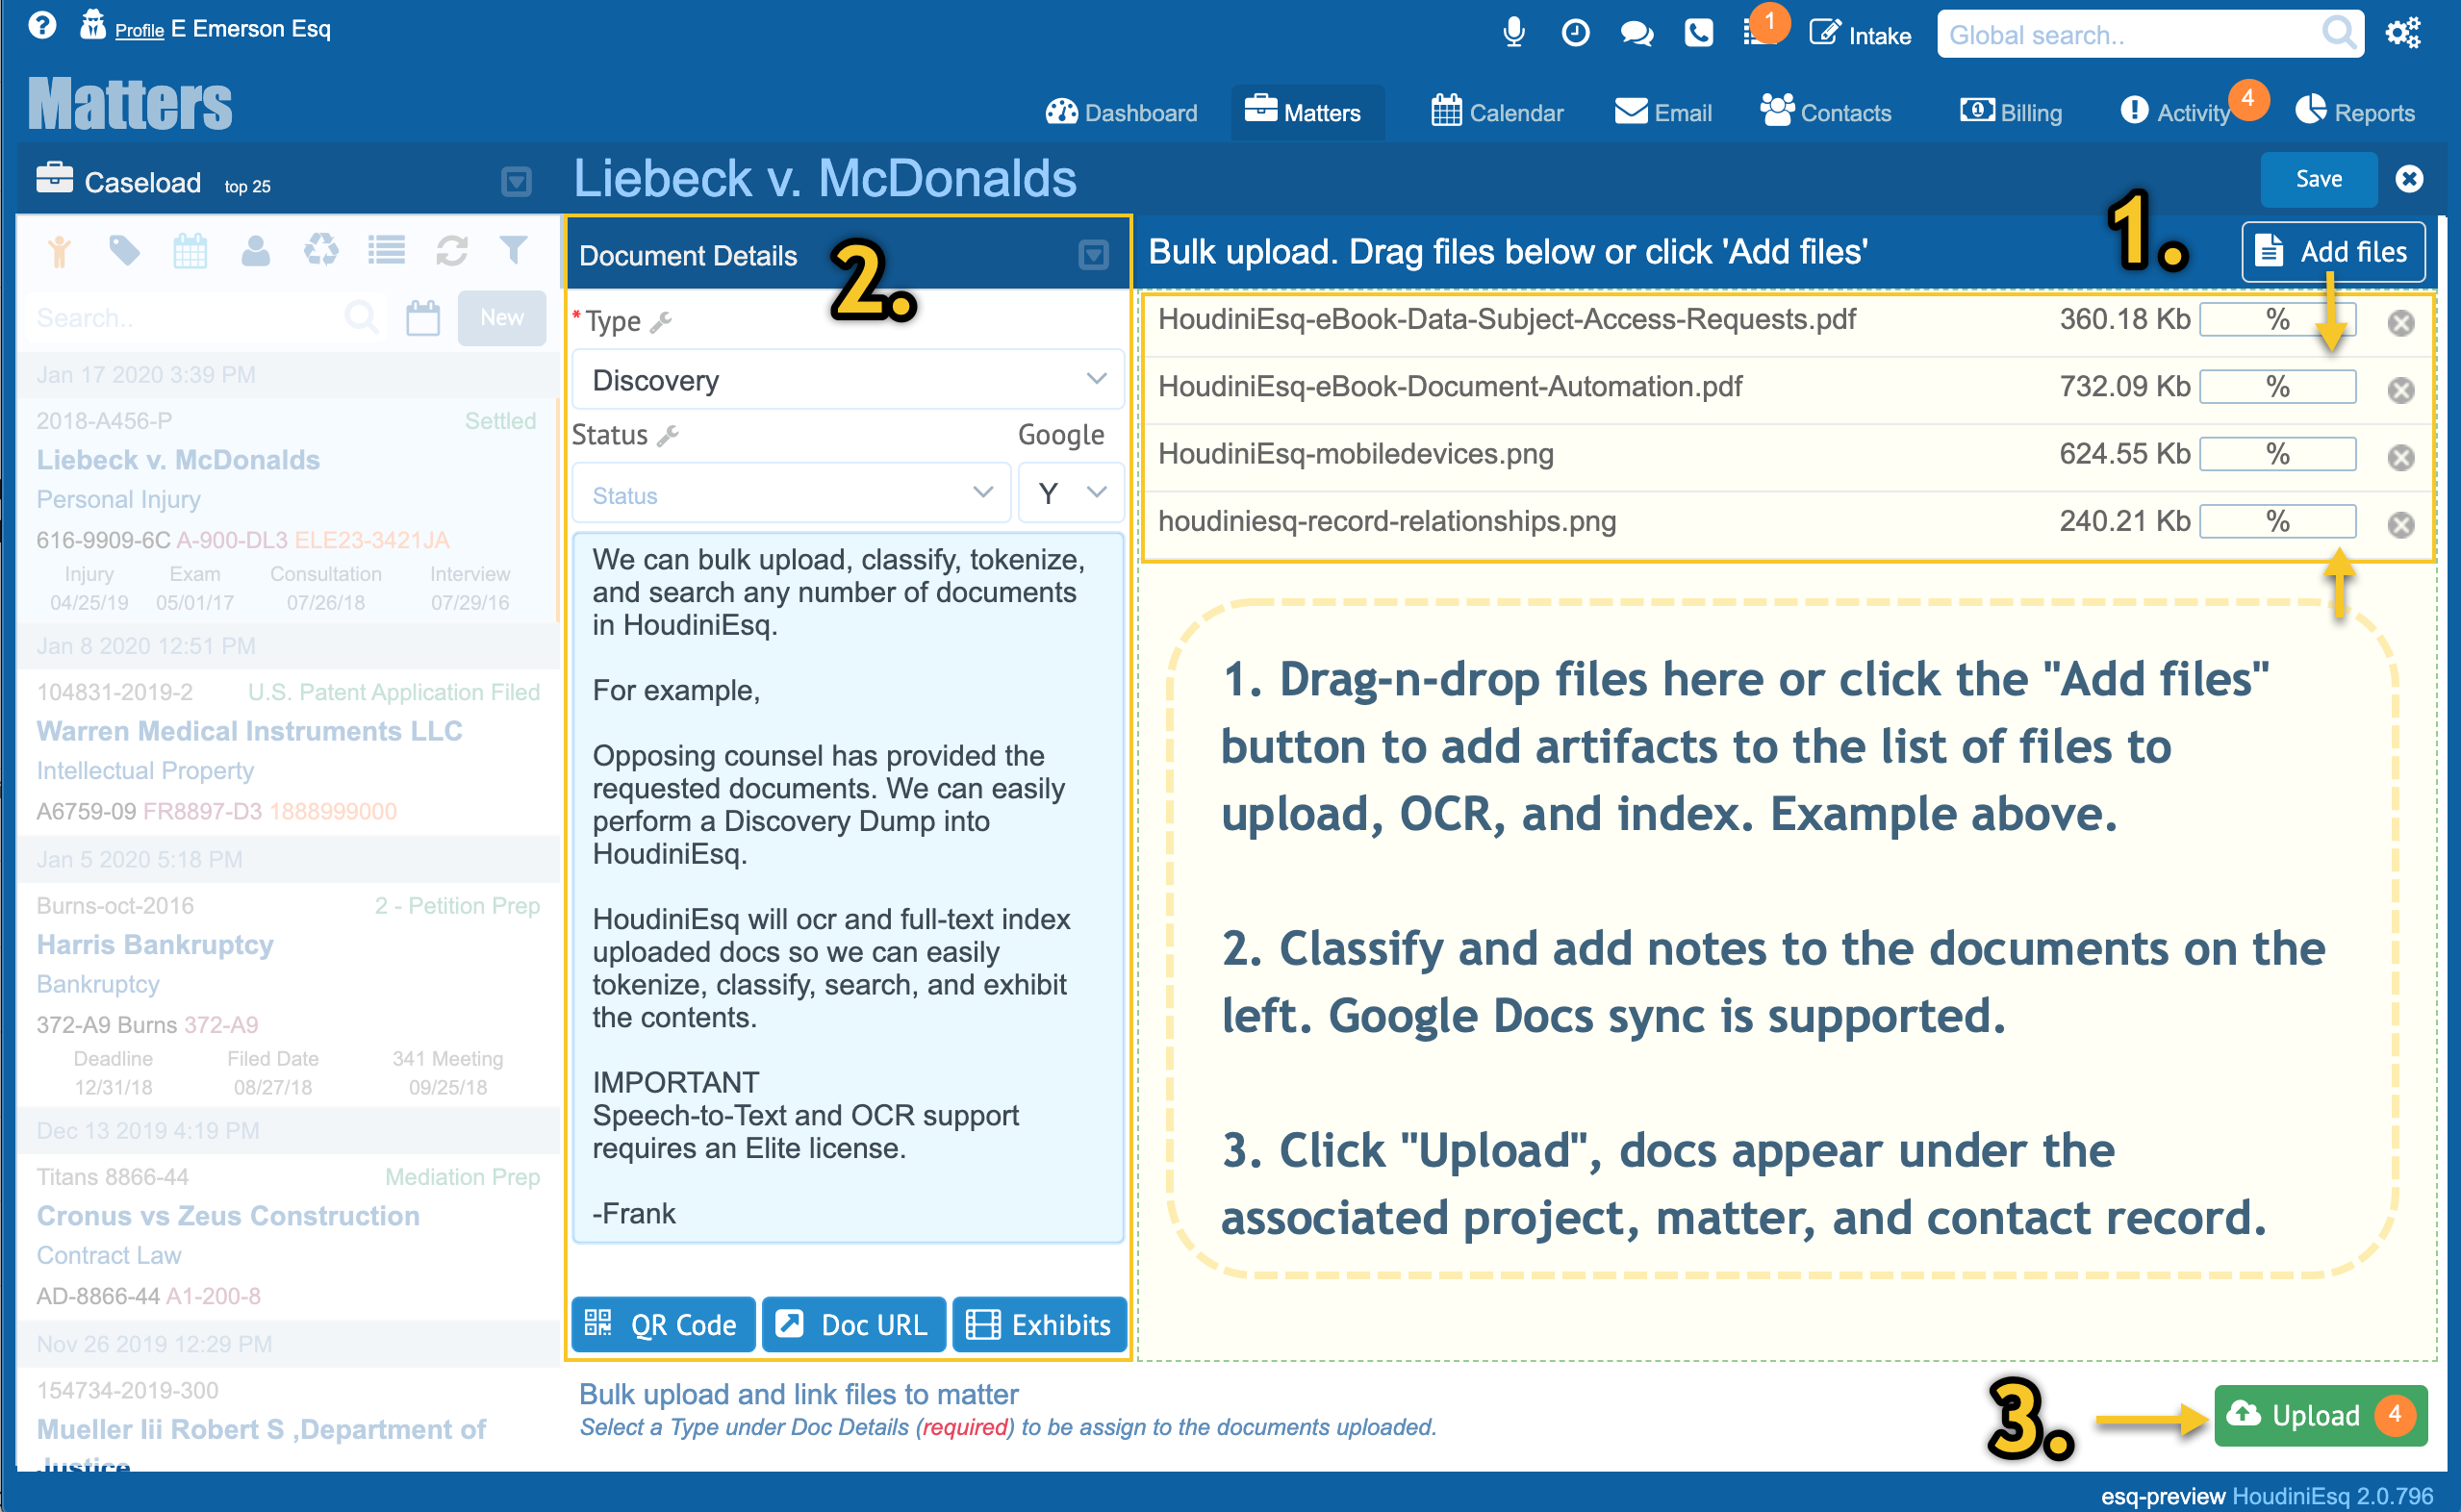
Uploading files is easy. Click the Upload button above the list to open the Bulk Upload Panel.

Single File or Bulk Upload
1. Drag and drop any number of files into the yellow highlighted area of the form.
2. Classify the documents by selecting a document type.
3. Click Upload.

Did you know
Clients or any party can securly upload documents as part of your organization’s Intake Process? For more details on Intake Forms see the Intake Forms Tutorial
Searching Documents
Local Search
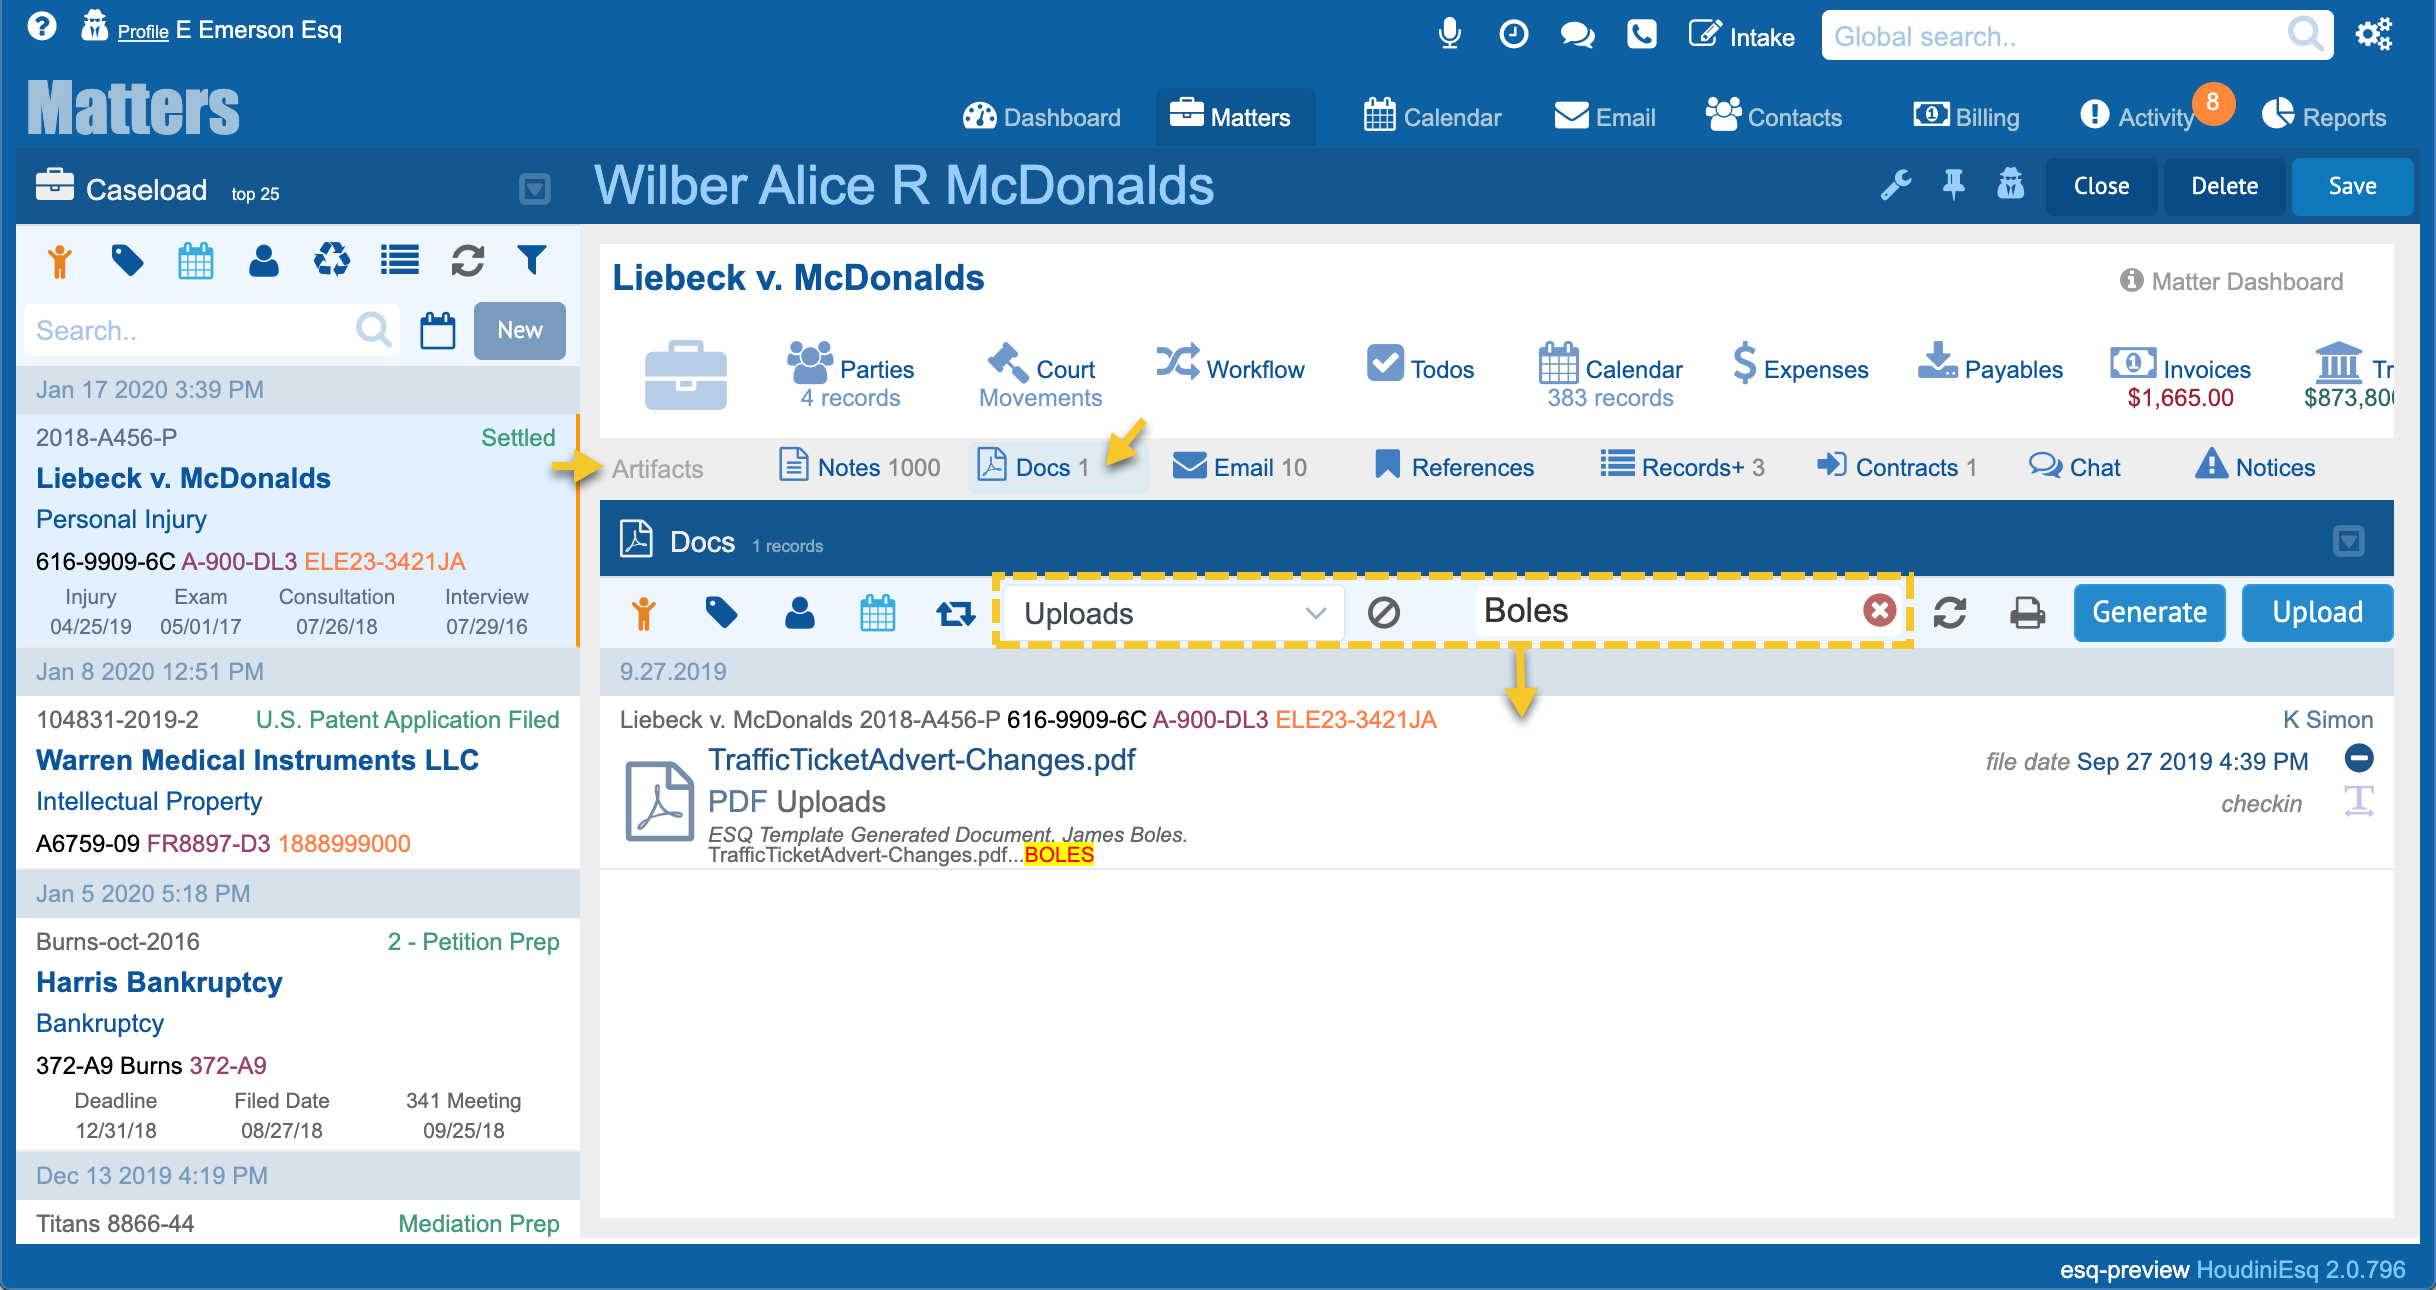
You can perform documents searches from any project, matter, or contact record’s Docs Tab.
To access a record’s documents and files click the Docs Tab.
When you enter a search term the search is performed across all the record’s associated documents.
Records are grouped and sorted by Date, Staff, Client, and Type. You can perform Implicit, Boolean and Logical Nots, Wild-card, Near Word, Sound Like, and Fuzzy searches. The image below depicts a matter’s Docs Tab.
Global Search
You can perform documents searches from the application’s Global Search panel.
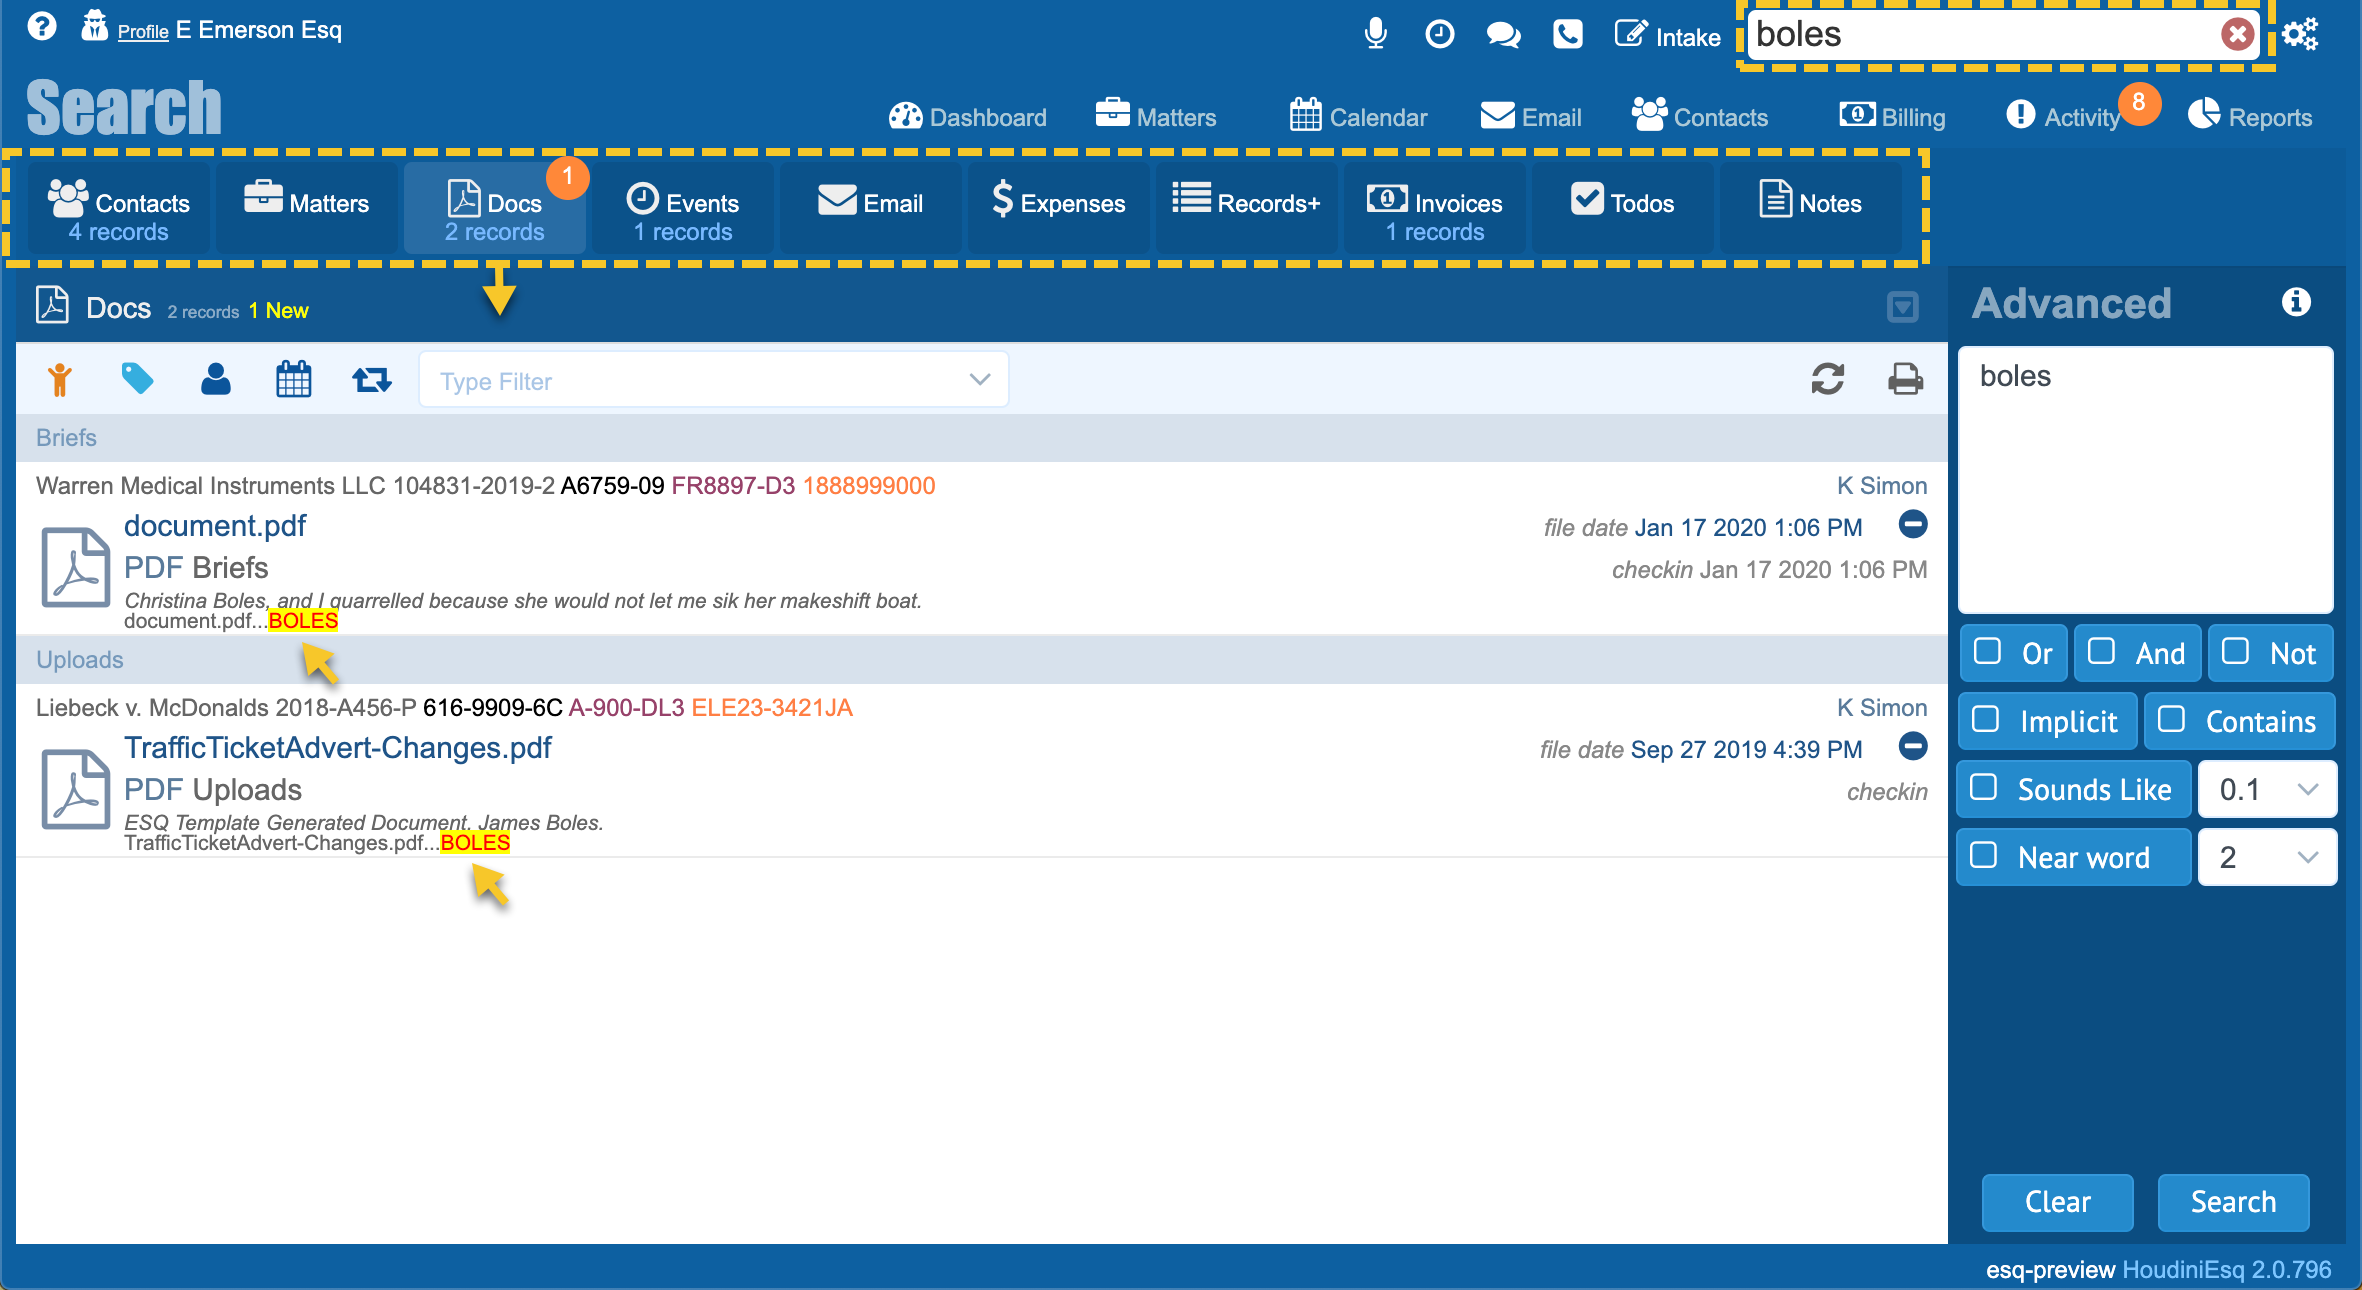
The image below depicts the Global search panel. To access Global Search click the Global Search Field in the upper right-hand corner of the HoudiniEsq Desktop.
When you enter a search term the search is performed across all of your data.
Records are grouped and sorted by their parent record type. Contacts, Matter, Docs, Events, Email, Expenses, Records+, Invoices, Todos, and Notes.
The Docs tab of the Global Search Panel has a Advanced tab on the right hand side of the panel. You can perform Implicit, Boolean and Logical Nots, Wild-card, Near Word, Sound Like, and Fuzzy searches.
Viewing and Sharing Documents
Sharing and Receiving Documents
The Client Portal and Intake Forms support the ability to securely share and receive documents with clients and parties. You get to define what is visible and for how long. For more info see the Client Portal Tutorial or the Intake Forms Tutorial
Viewing Documents and Details
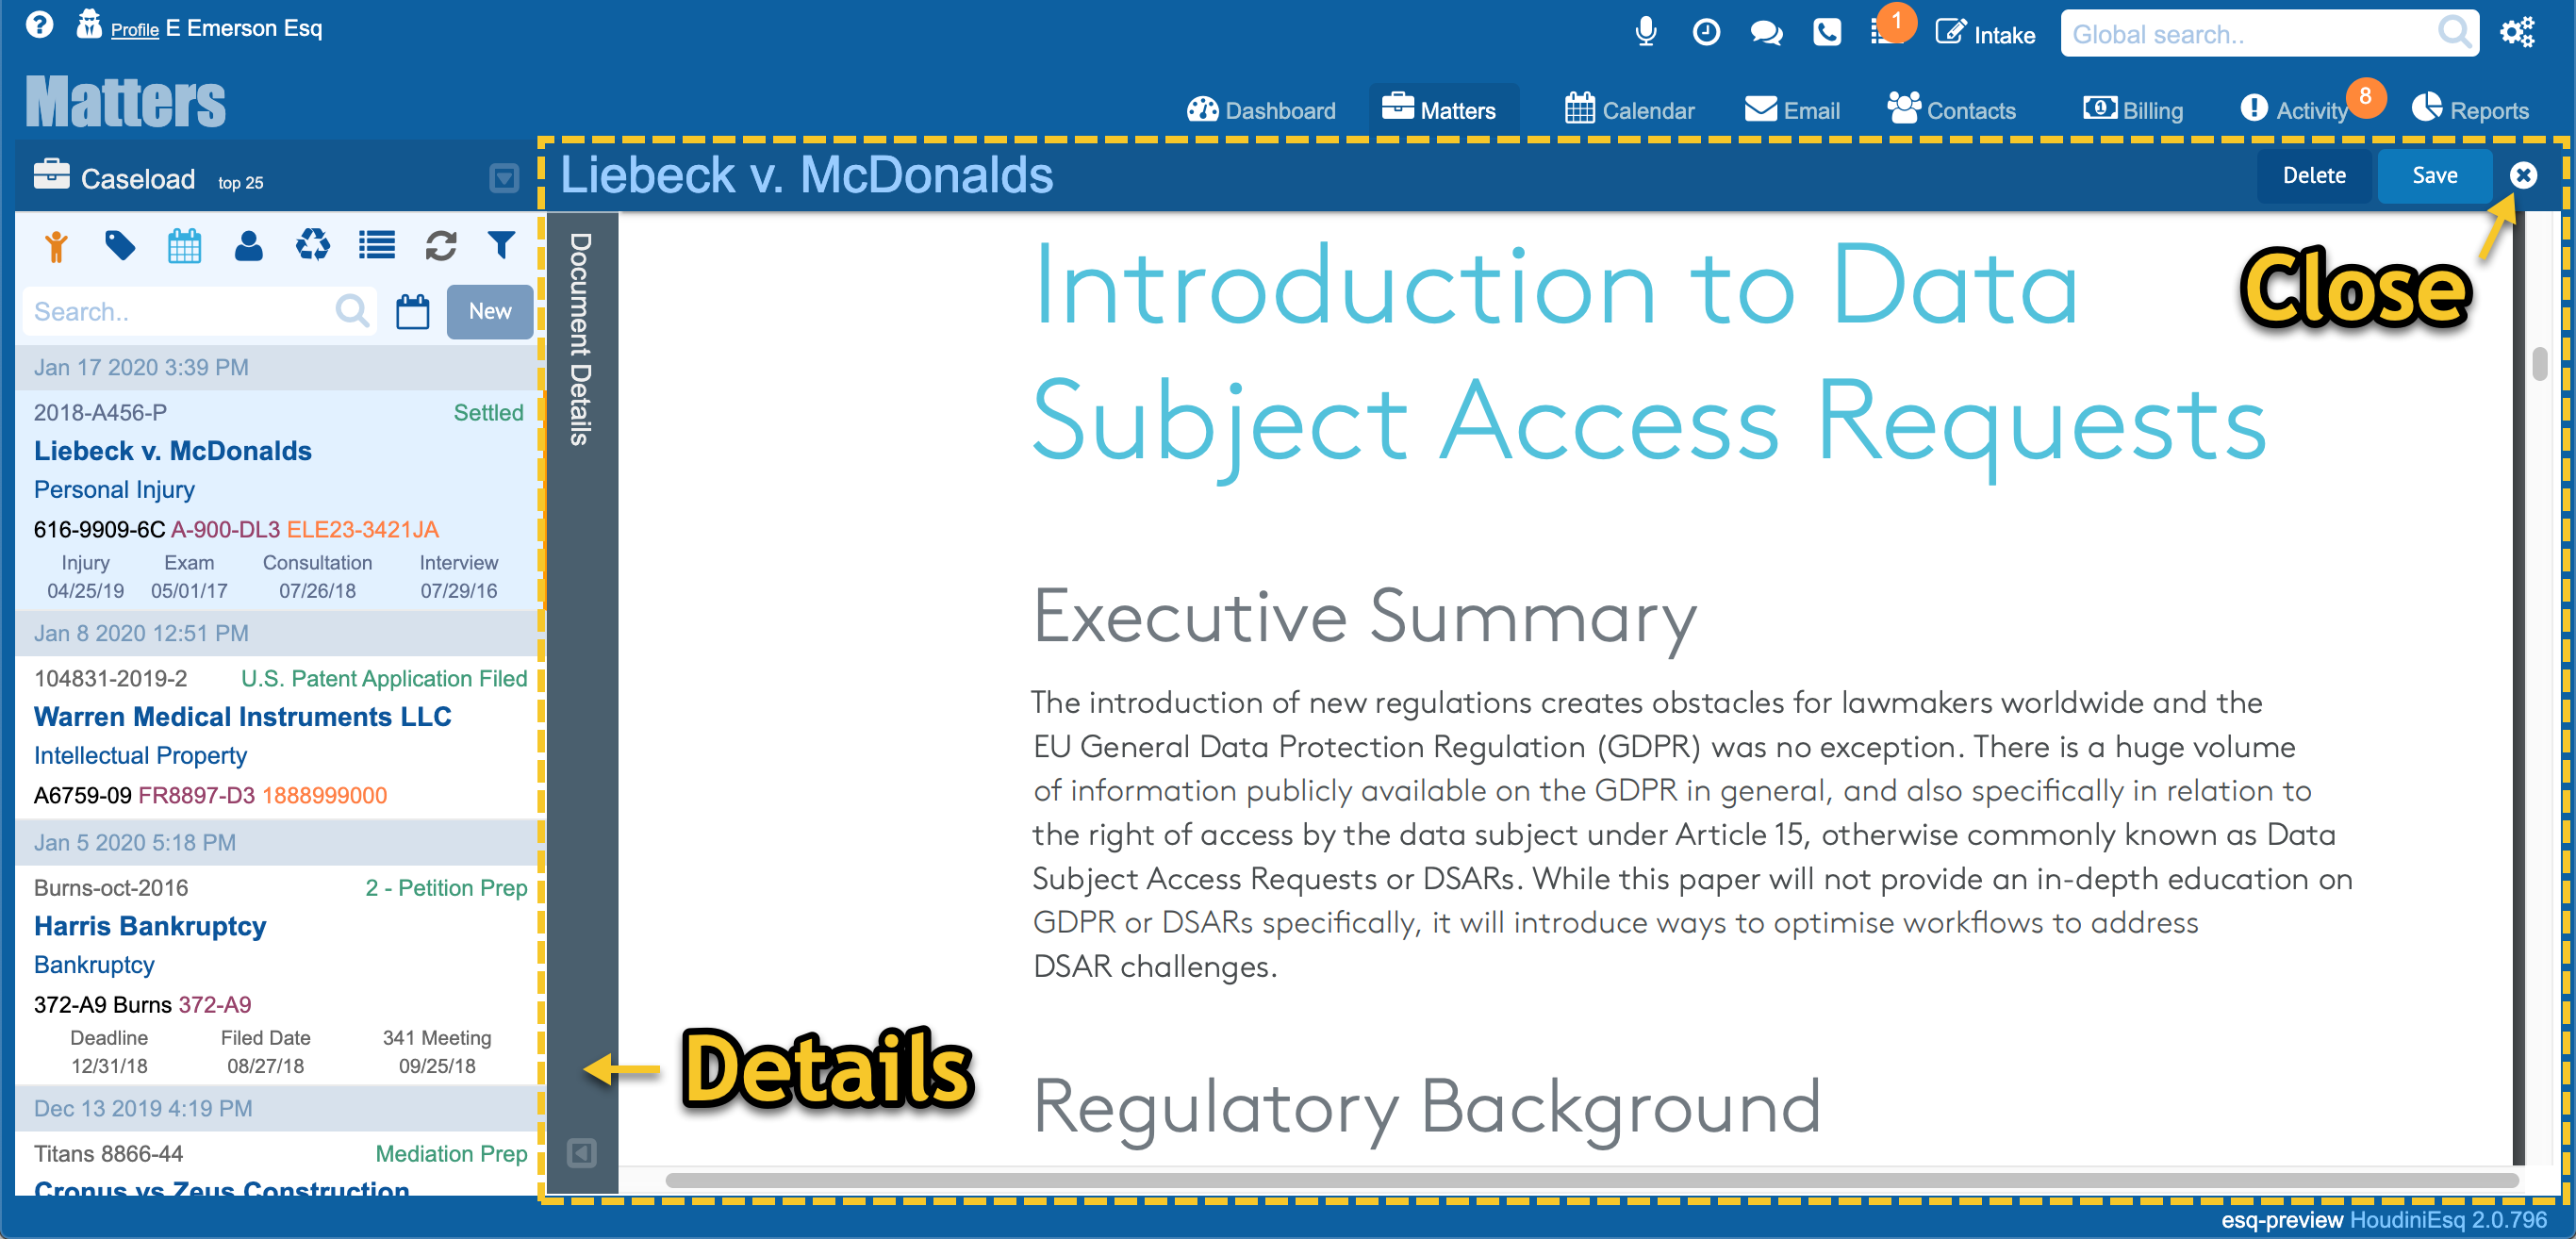
To view a document Double Click any record in the Doc’s Tab List.
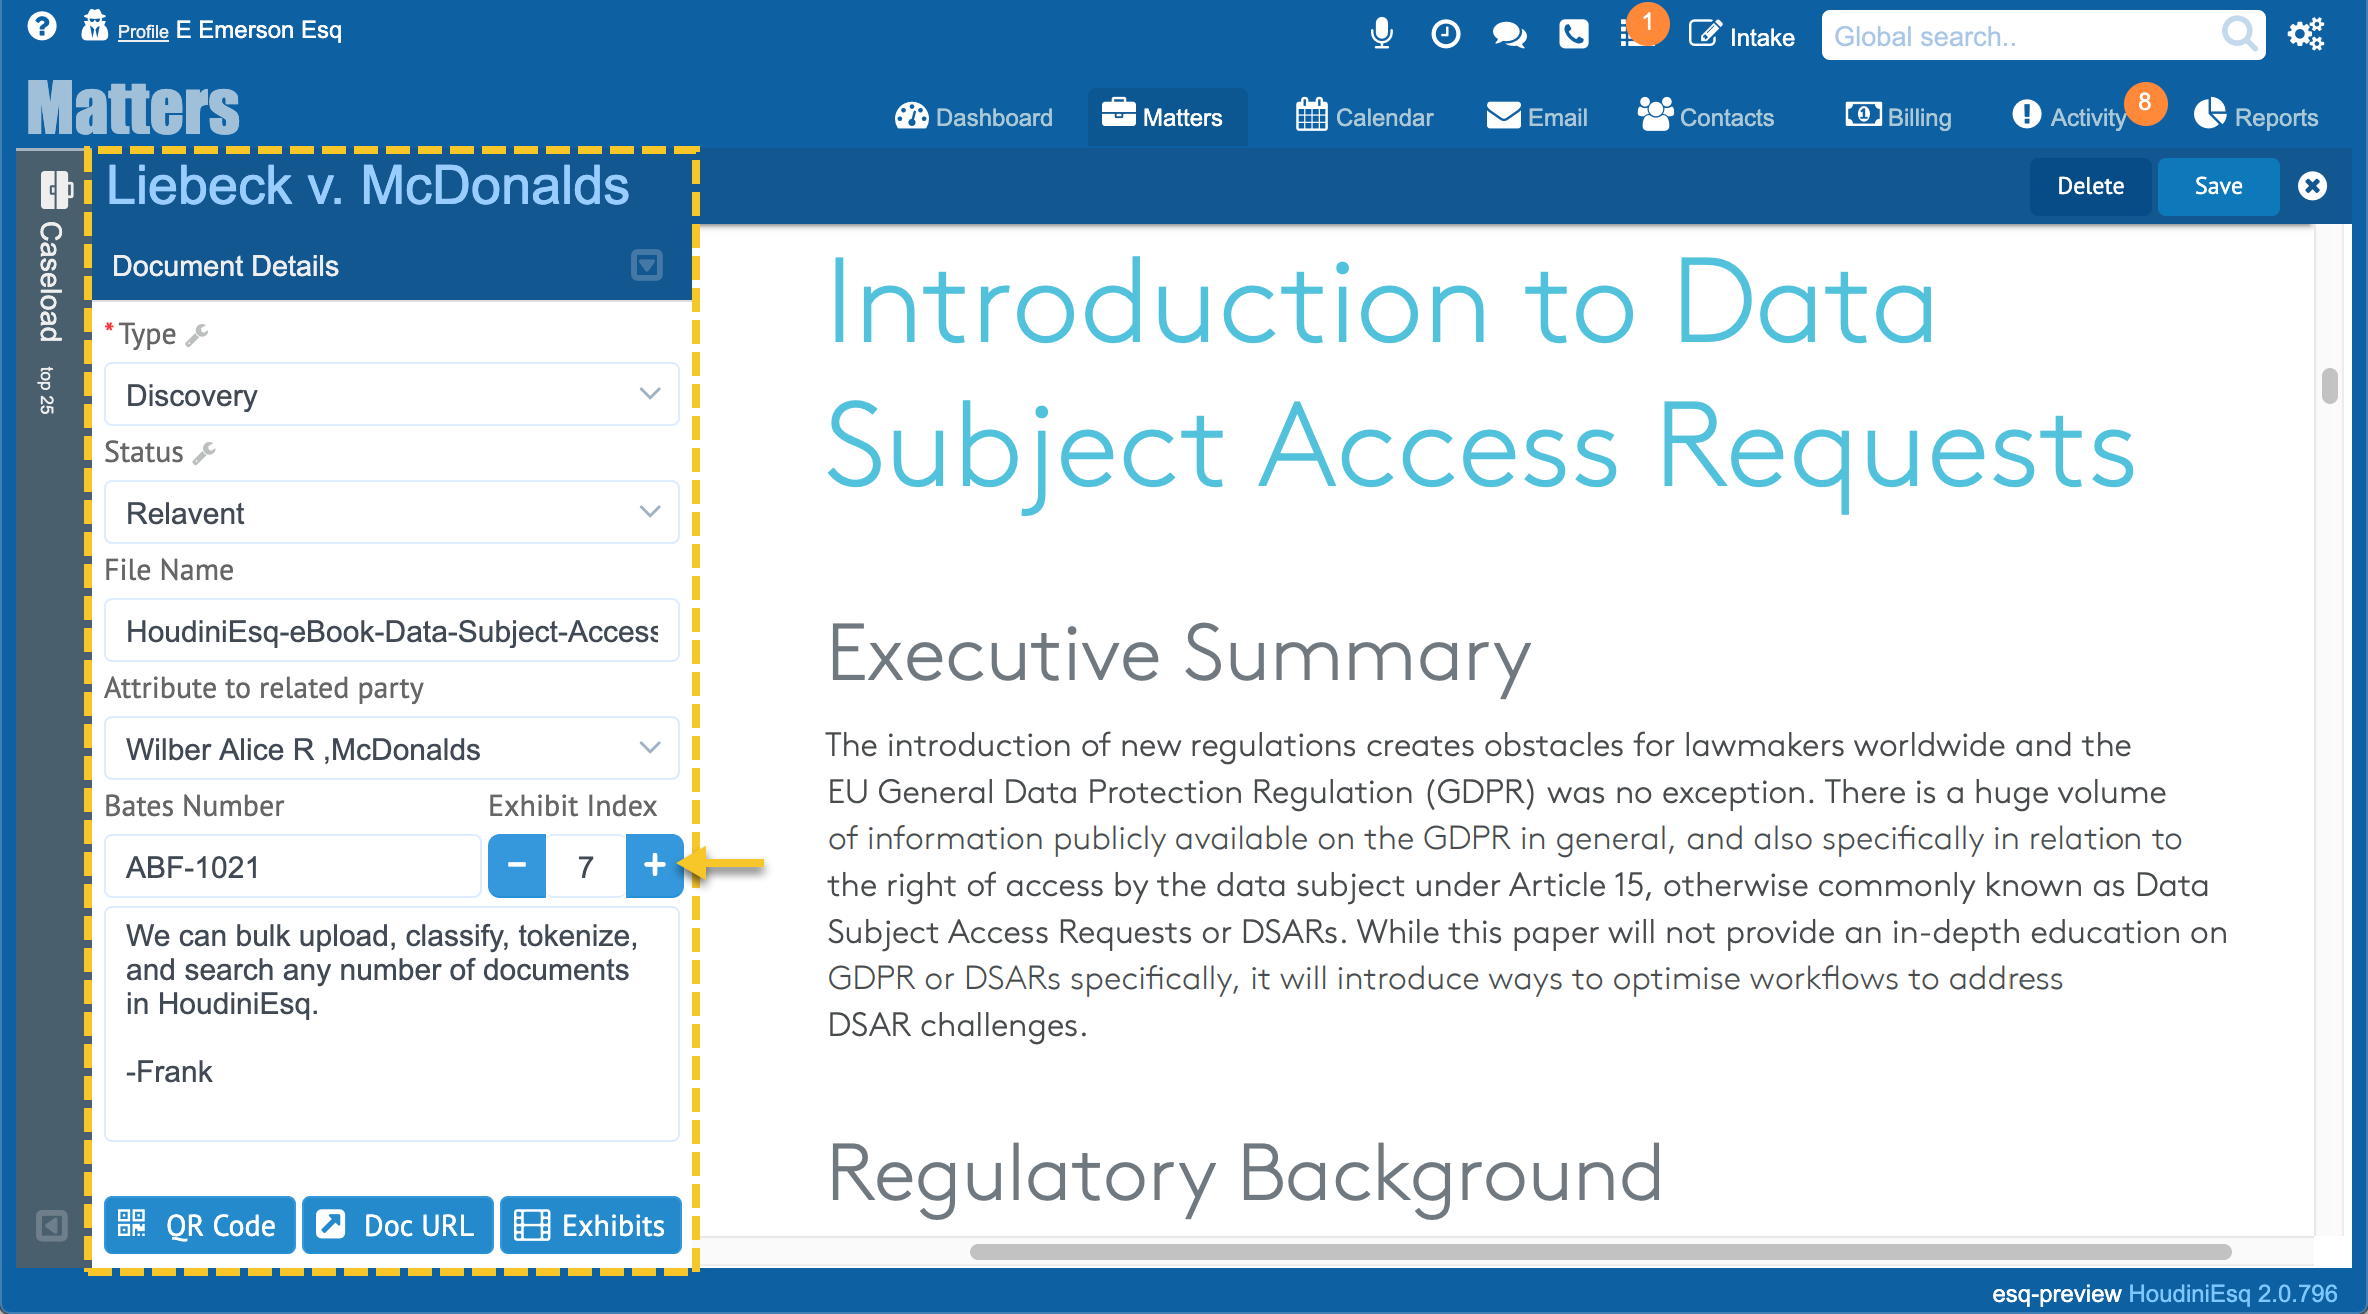
To view or edit document details click the Details Tab on the left-hand side of the document to review or edit its details.
When done click the Save button or the (X) icon in the upper right-hand corner of the document to return to the list.
IMPORTANT Only PDF files are viewable in the interface. Word files are downloaded and opened in MS Office.
Documents can be uploaded, generated, grouped, filtered, searched, edited and viewed from any project, matter, or contact record. Including Word, Office365, Acrobat, and Outlook. For more information on the Free HoudiniEsq Plugins see the HoudiniEsq Downloads Page
Mobile Document Access
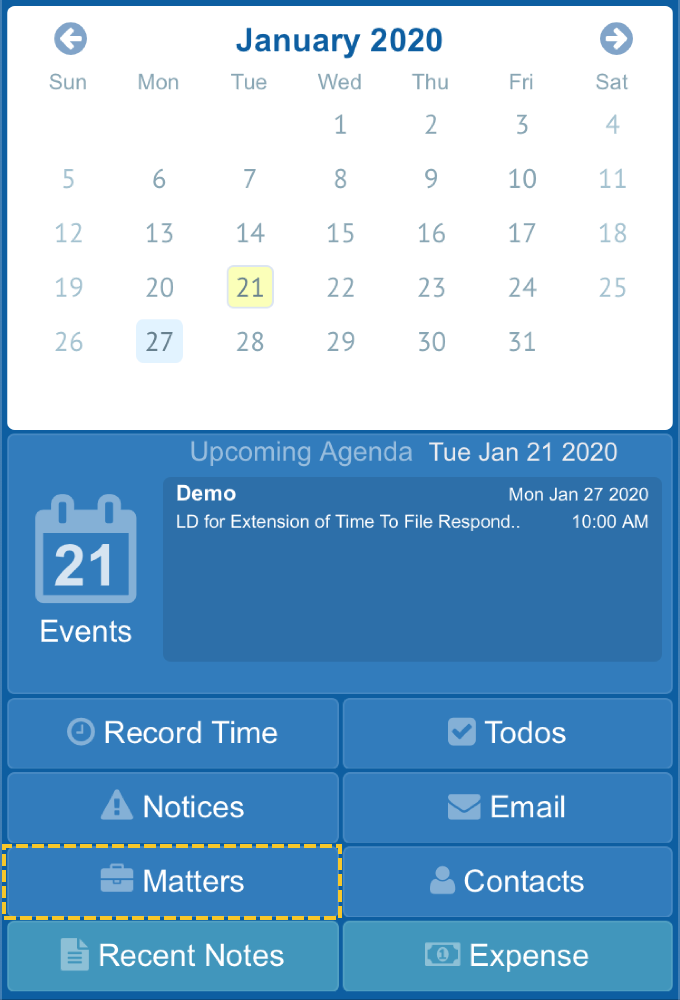
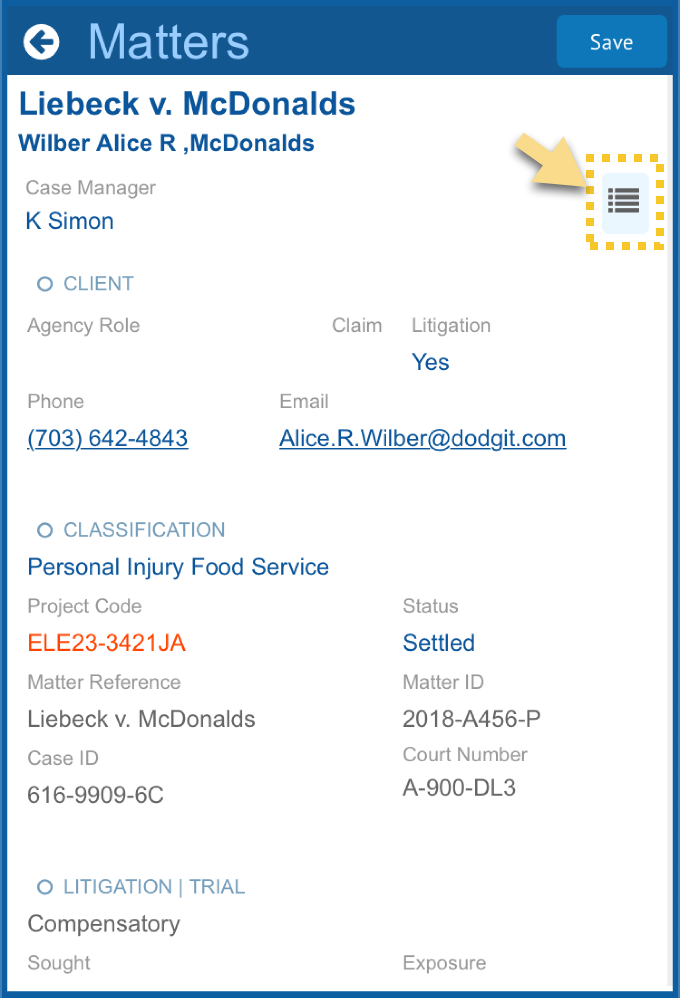
To view a document on your mobile phone use the public URL you use to log in remotely or via the cloud. The mobile interface will load automatically. Navigate to the project, matter or contact record. Tap the menu icon in the upper right-hand side of the App. Click the Docs icon to reveal the list. Double Click any record to view the file.
IMPORTANT Only PDF files are viewable in the interface. Word files are downloaded and opened in MS Office.
Mobile UI
Matter Form
Matter Menu
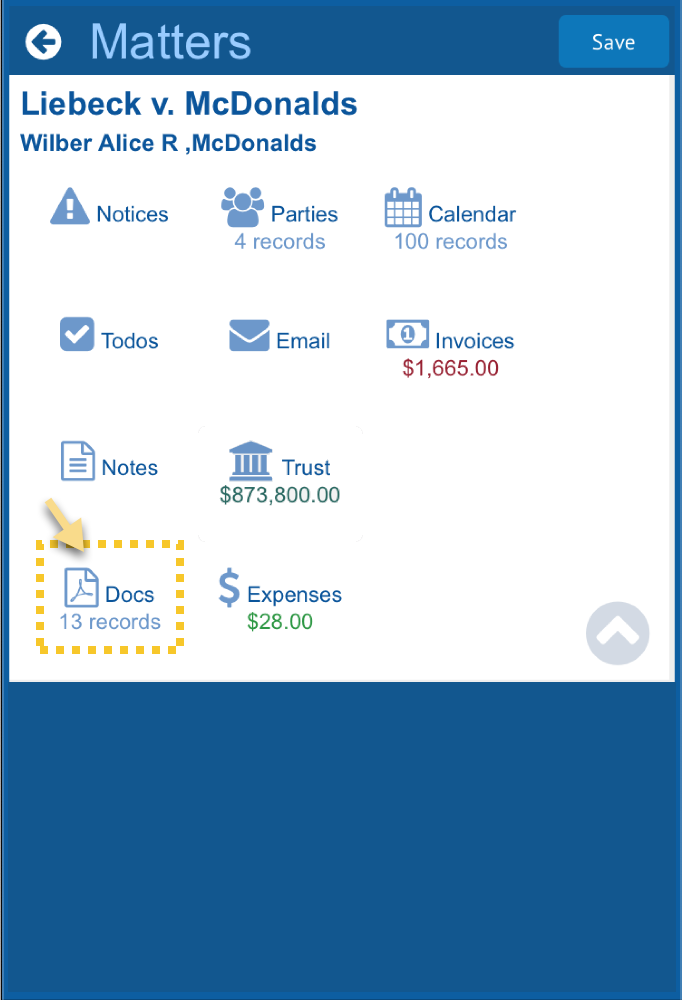
Document List
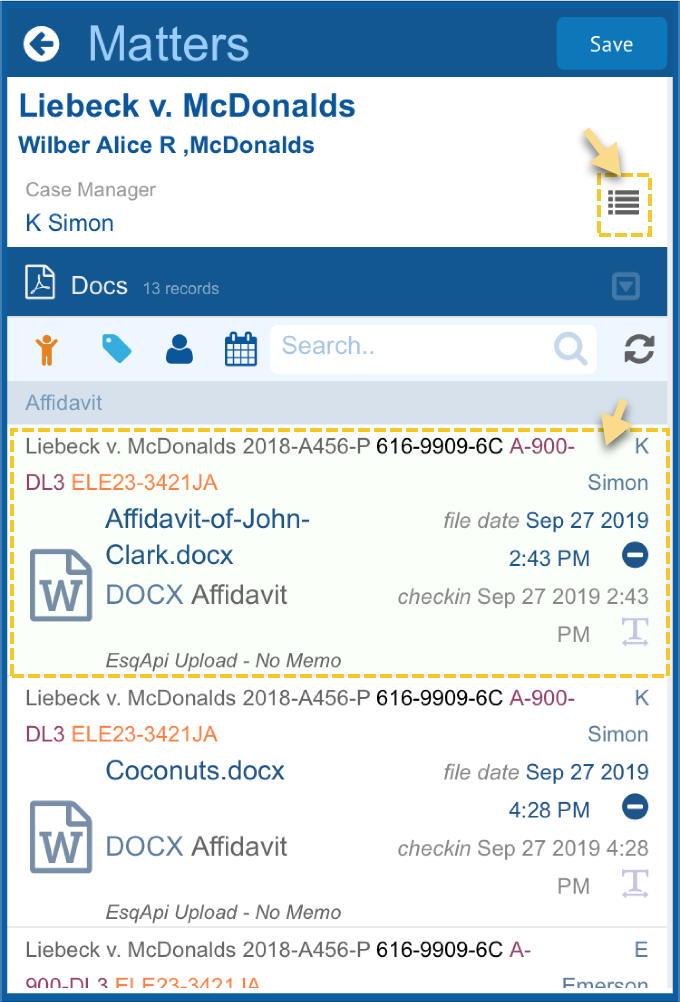
Document
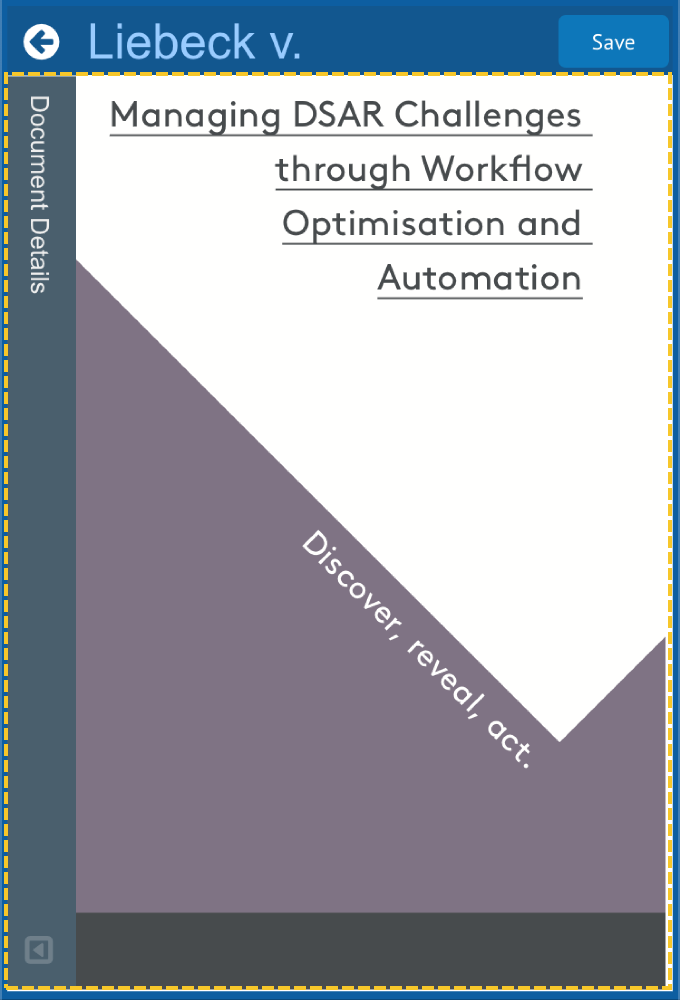
Exhibiting Documents
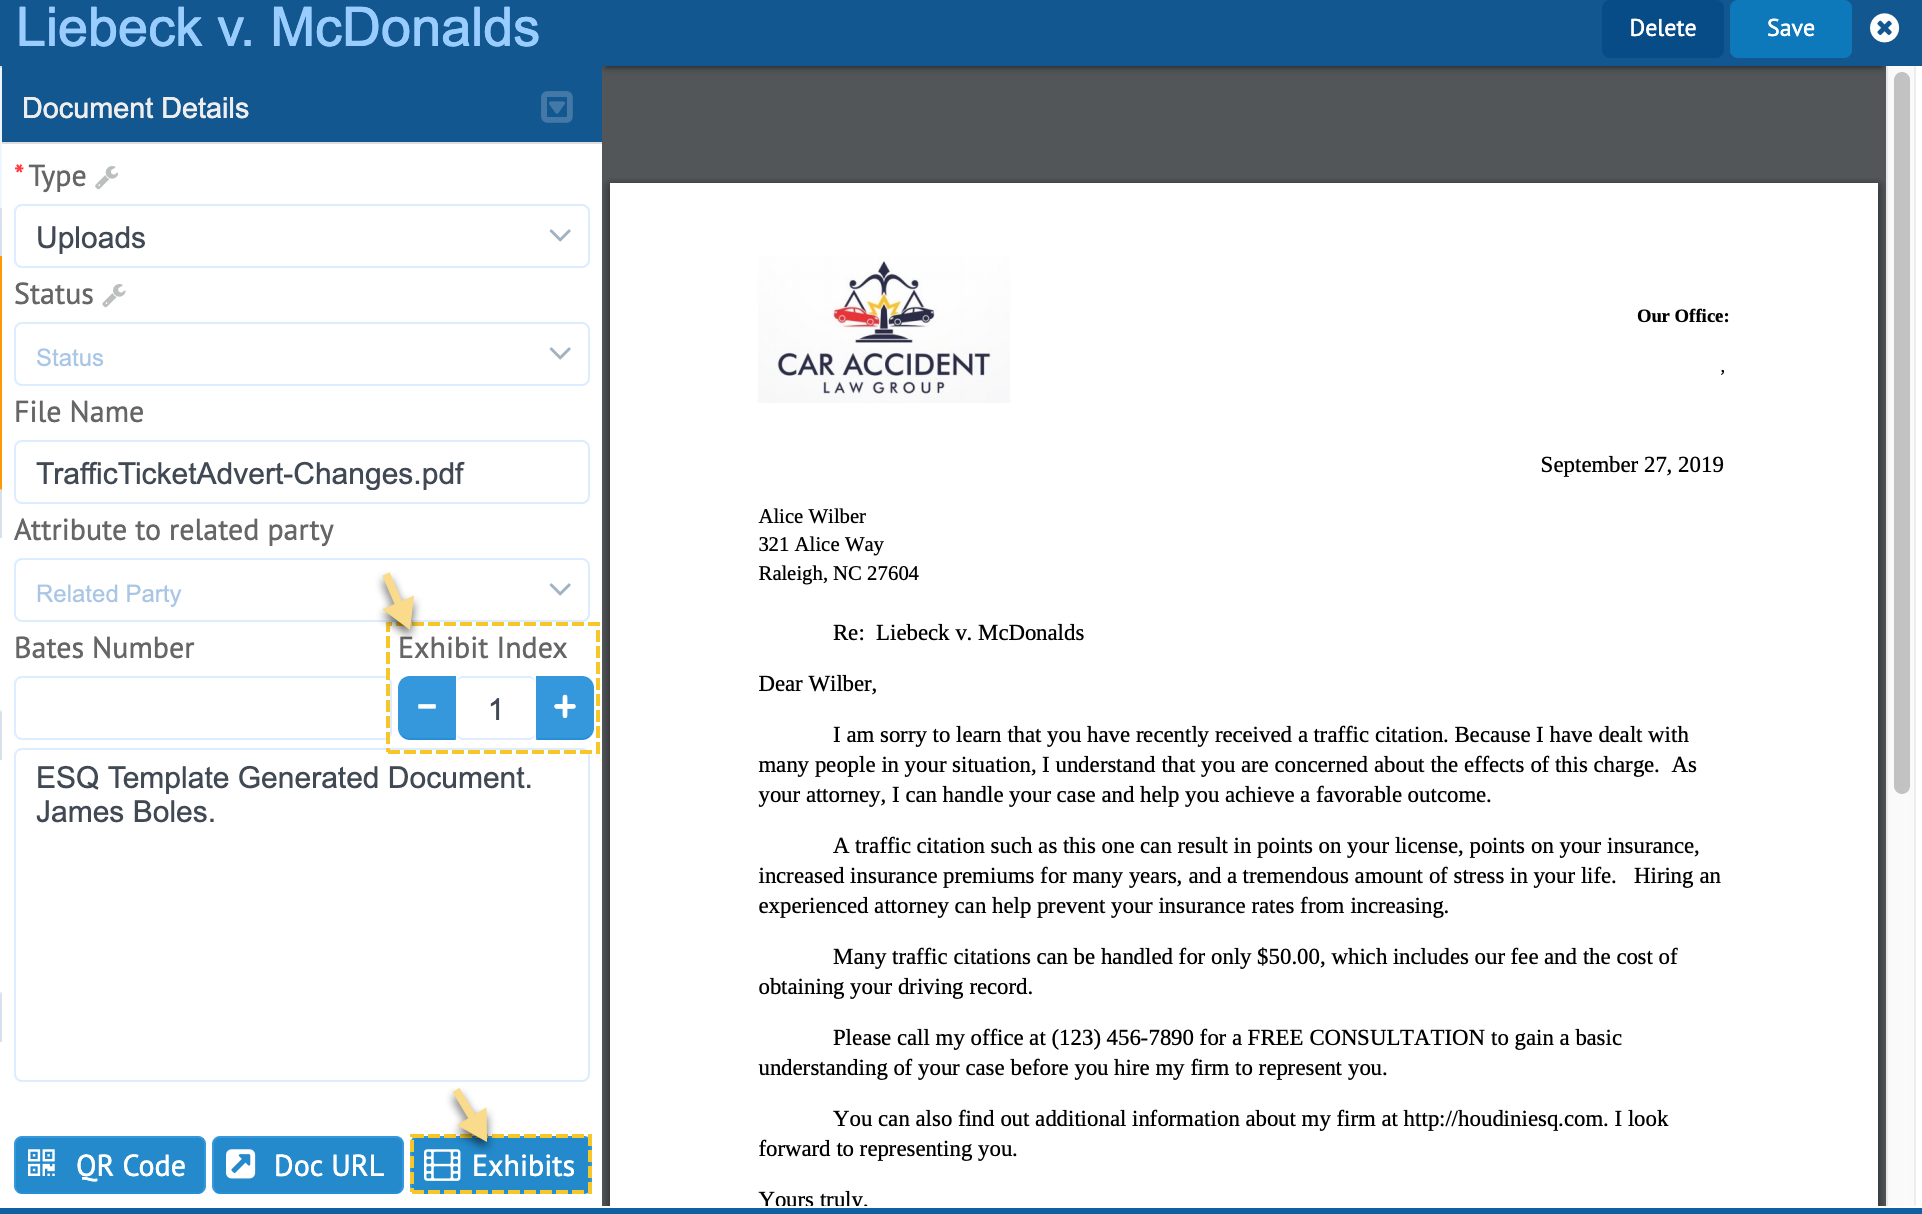
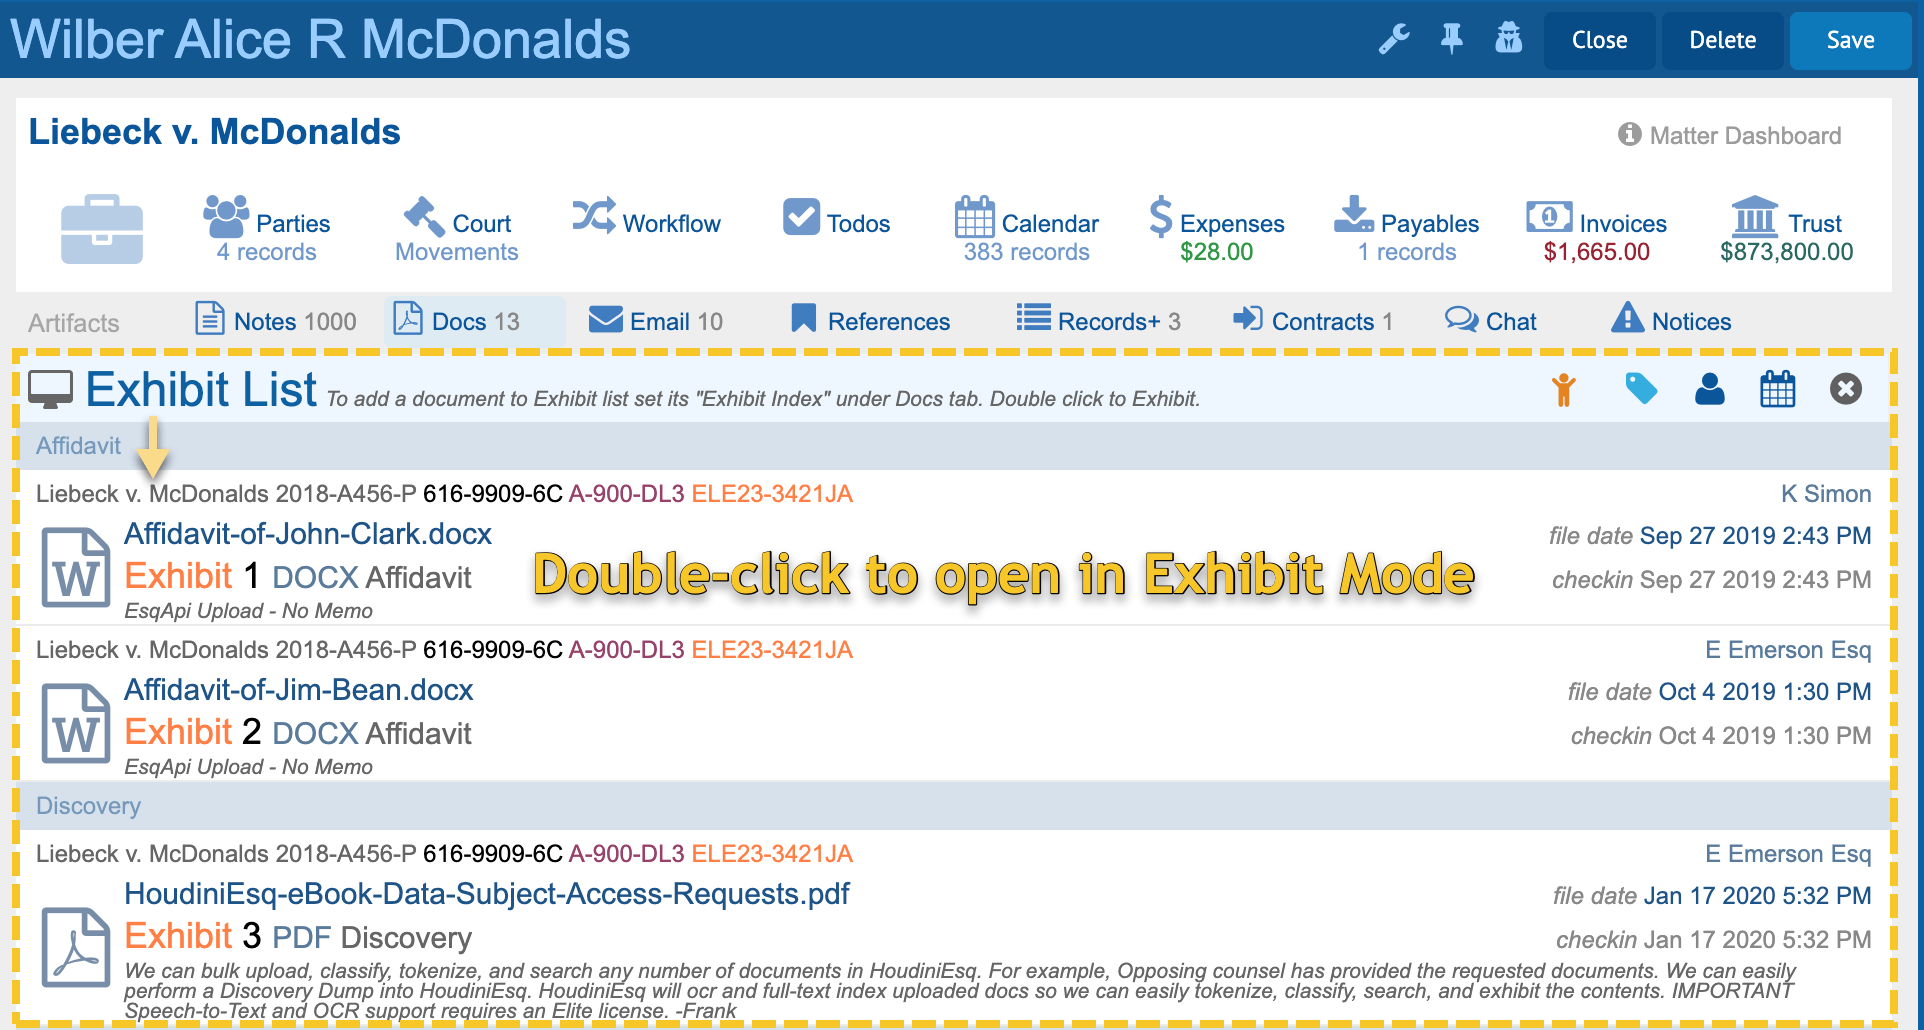
In order to exhibit a document you must assign it an exhibit number. To do so open the document as explained above and open the Details Tab. Assign an Exhibit Number. To view the Exhibits list you can click the Exhibit Button in the Details Tab or you can click the Exhibits Icon on the project or matter form.
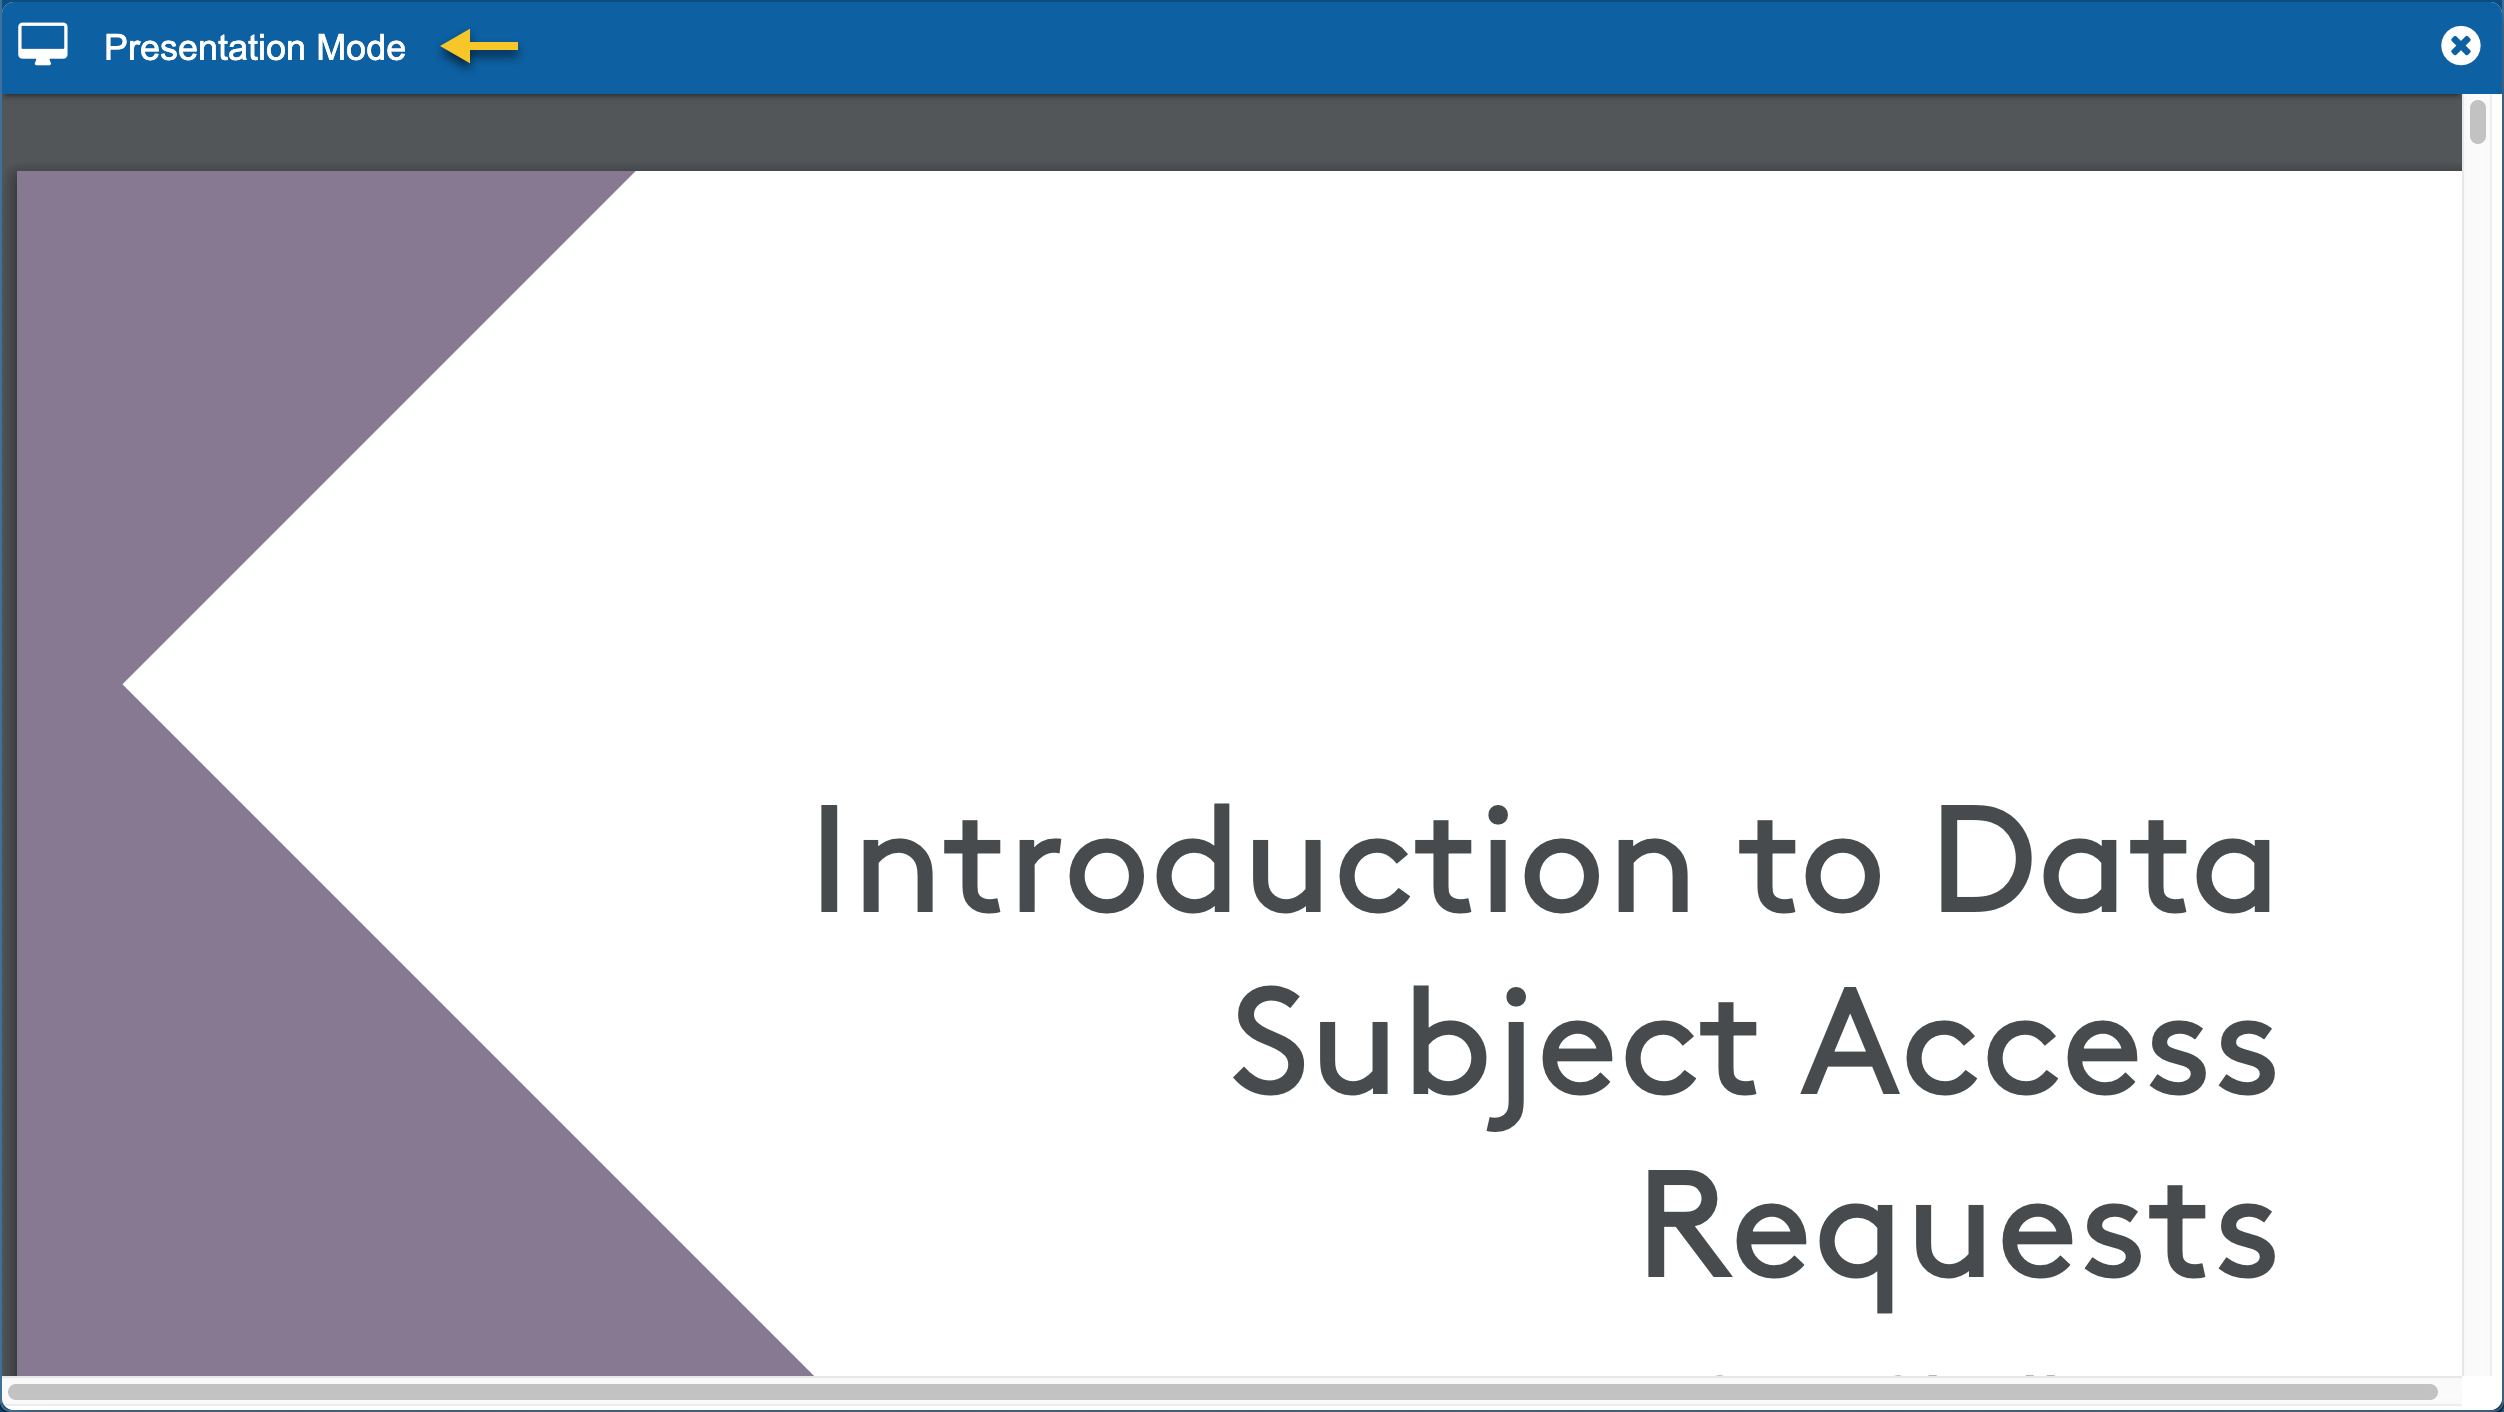
Set Exhibit Index Doc Details Tab
Viewing Exhibit List
Exhibits are managed from the Matter or Project’s Docs Tab.


Secure Links
Quickly add collections of documents to your devices.
If you require access to documents but think that you may not have access to Cellular, Wifi, or the Internet, click the QR Code button at the bottom of the Document Details panel and point your camera at the code. This will open the document in your device’s browser. Keep the browser tabs ion or save locally on your device for easy secure offline access.
IMPORTANT These secure links open documents outside HoudiniEsq. However, you will need to provide the IRIS password on your device when asked if you have not done so in the past.
On-premise users and licensees
In order to access files outside your local or wide area network you must configure HoudiniEsq for Private Cloud Access. For more info on Private Cloud and Remote Access see the HoudiniEsq Private Cloud Tutorial
Android Pixel Phone Users
You must use the Lens App on your phone to read QR Codes.
This is a known bug with the Motorola ICs on the PIxel phone.

Did you know
You can securely share documents with co-counsel or any party with the Client Portal? For more details on the Client Portal see the Client Porta Tutorial
Generating Documents
Document Templates
In order to generate documents a document template is required. A document template is created in the OpenDocument format e.g ODT file extension. MS Word, OpenOffice, LibreOffice, and WordPerfect support the OpenDocument format.
You can work with your documents from the programs you use everyday. HoudiniEsq supports creating and generating documents and templates from in MS Word, Office365, and WordPerfect.
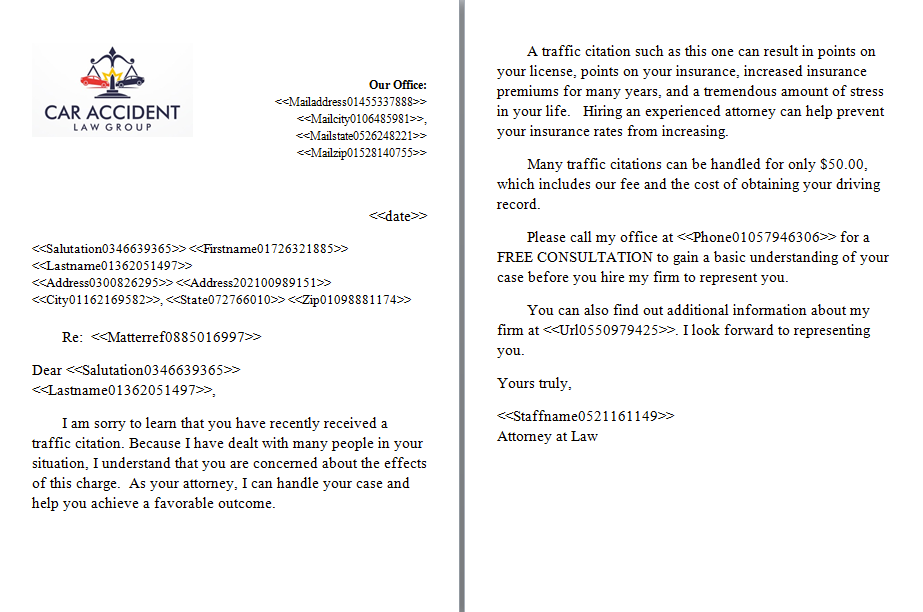
Templates are created by including HoudiniEsq Data Merge Tokens into the document. The image below illustrates a document template being edited in MS Office.
Converting Document Templates
To create a template from an existing document simply save the existing document in MS Word as an ODT (OpenDocument) file. Insert HoudiniEsq Data Merge Field Tokens via MS Word or manually via the HoudiniEsq Data Merge Field Reference (as described below) into the document template in the appropriate places and upload the template into HoudiniEsq as described in Uploading Document Templates tutorial below.
Data Merge Fields Reference
The data merge field tokens can be accessed from within MS Word via the Free HoudiniEsq plugin for Word. You can also view data merge field tokens and drop them into 3rd party document editors such as WordPerfect, Office365, LibreOffice or OpenOffice.
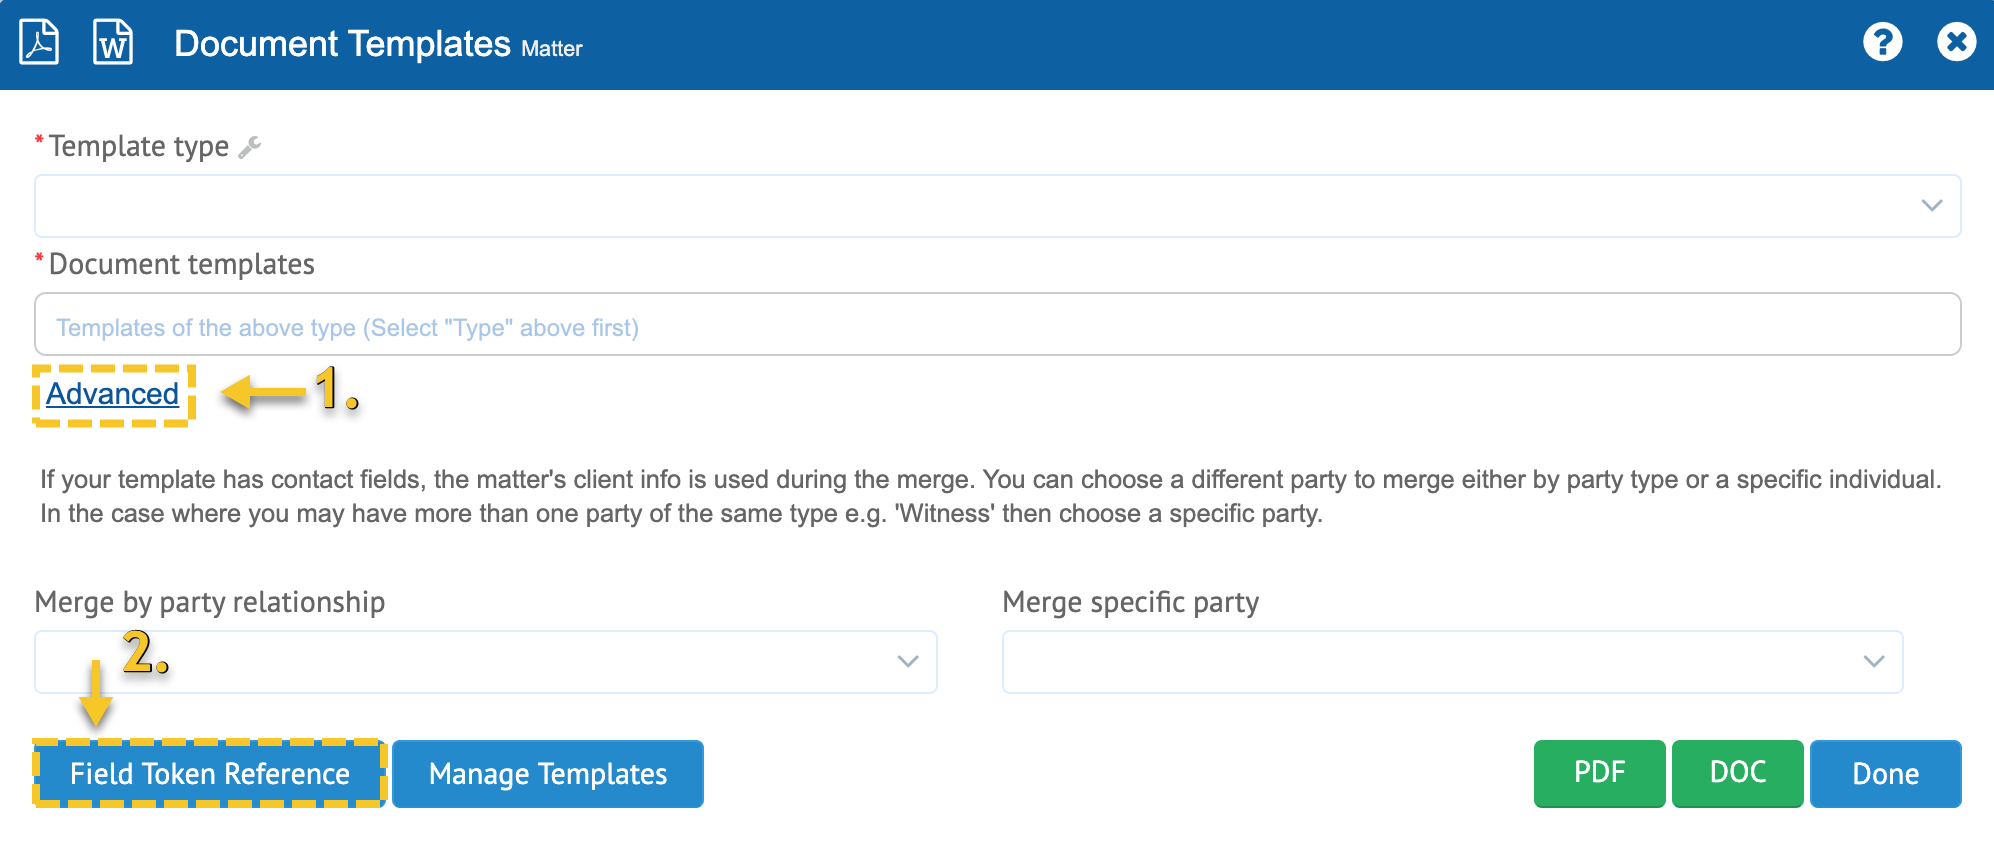
To begin, click the Generate button to open the Document Template panel.
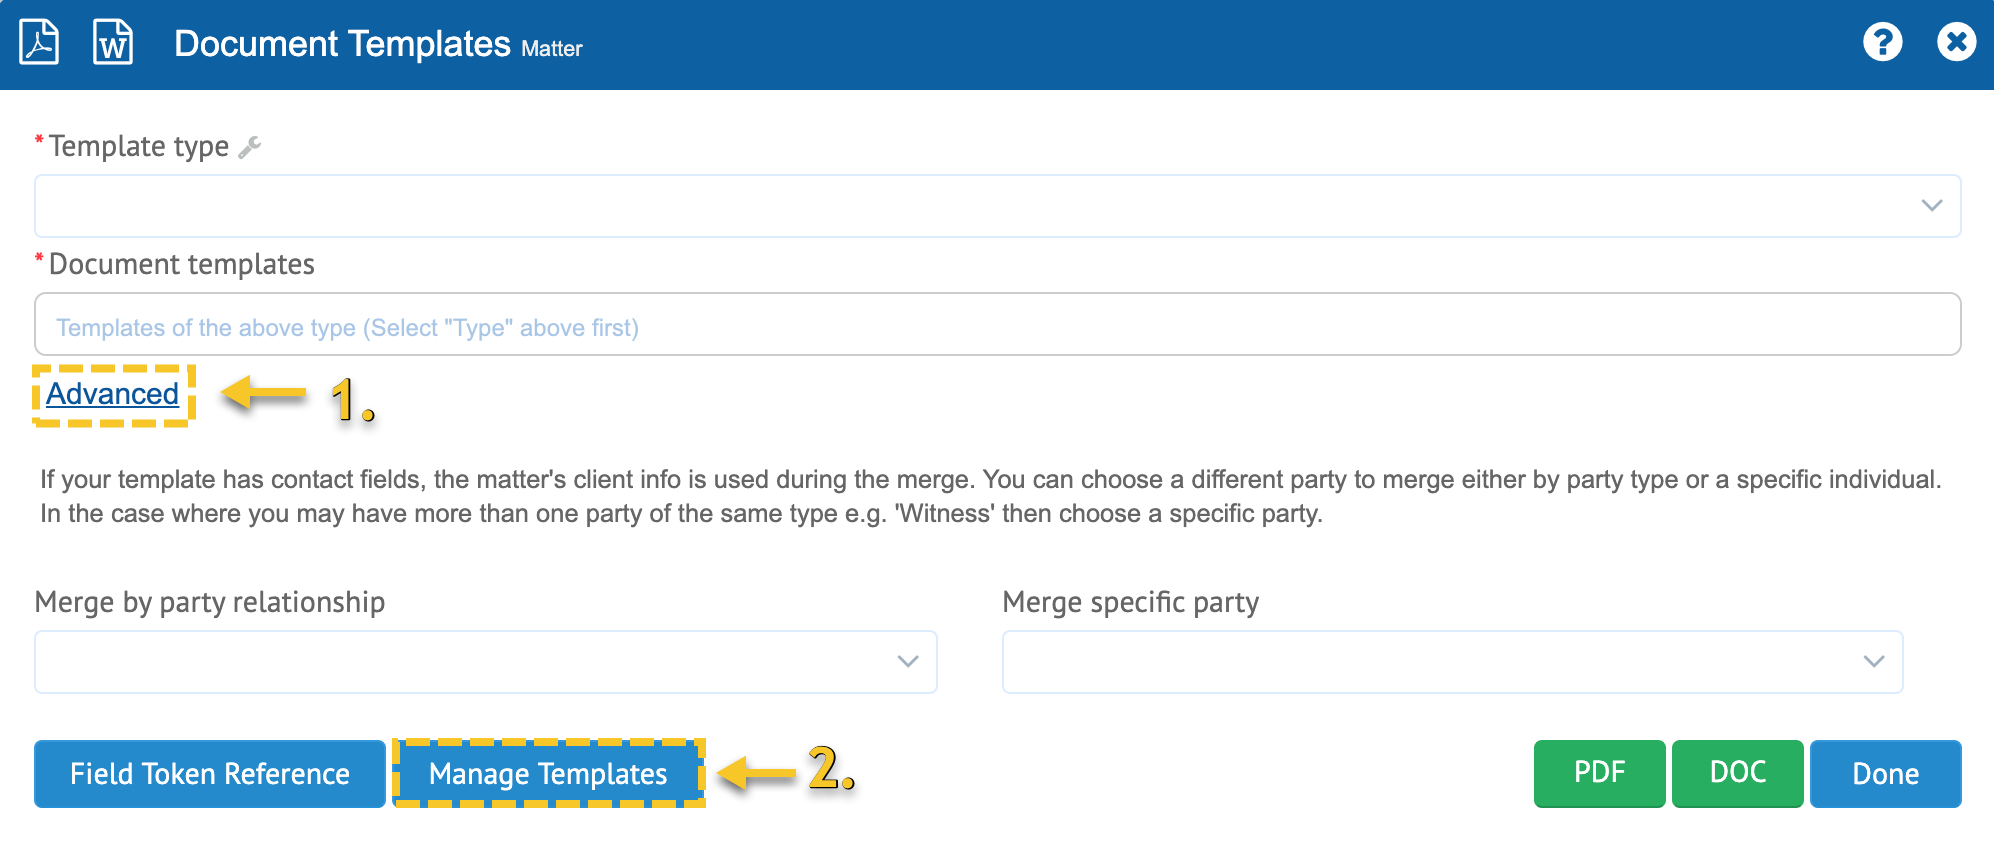
Click the Advanced button to expose the advanced options. Click the Field Token Reference button to reveal the Field Token options.

To lookup a Data Merge Field Token
1. Select the Table e.g. Matter, Contact, etc,.
2. Select the Record Type the Custom Field was assigned and optionally the Subtype. The List of Fields Dropdown field will populate with the friendly Field Name. Select the Field to reveal its Token Value which is displayed in the Field Token field.

Uploading Document Templates
The HoudiniEsq add-ons and plugins for Word, and WordPerfect can be used to save and upload templates in to HoudiniEsq.
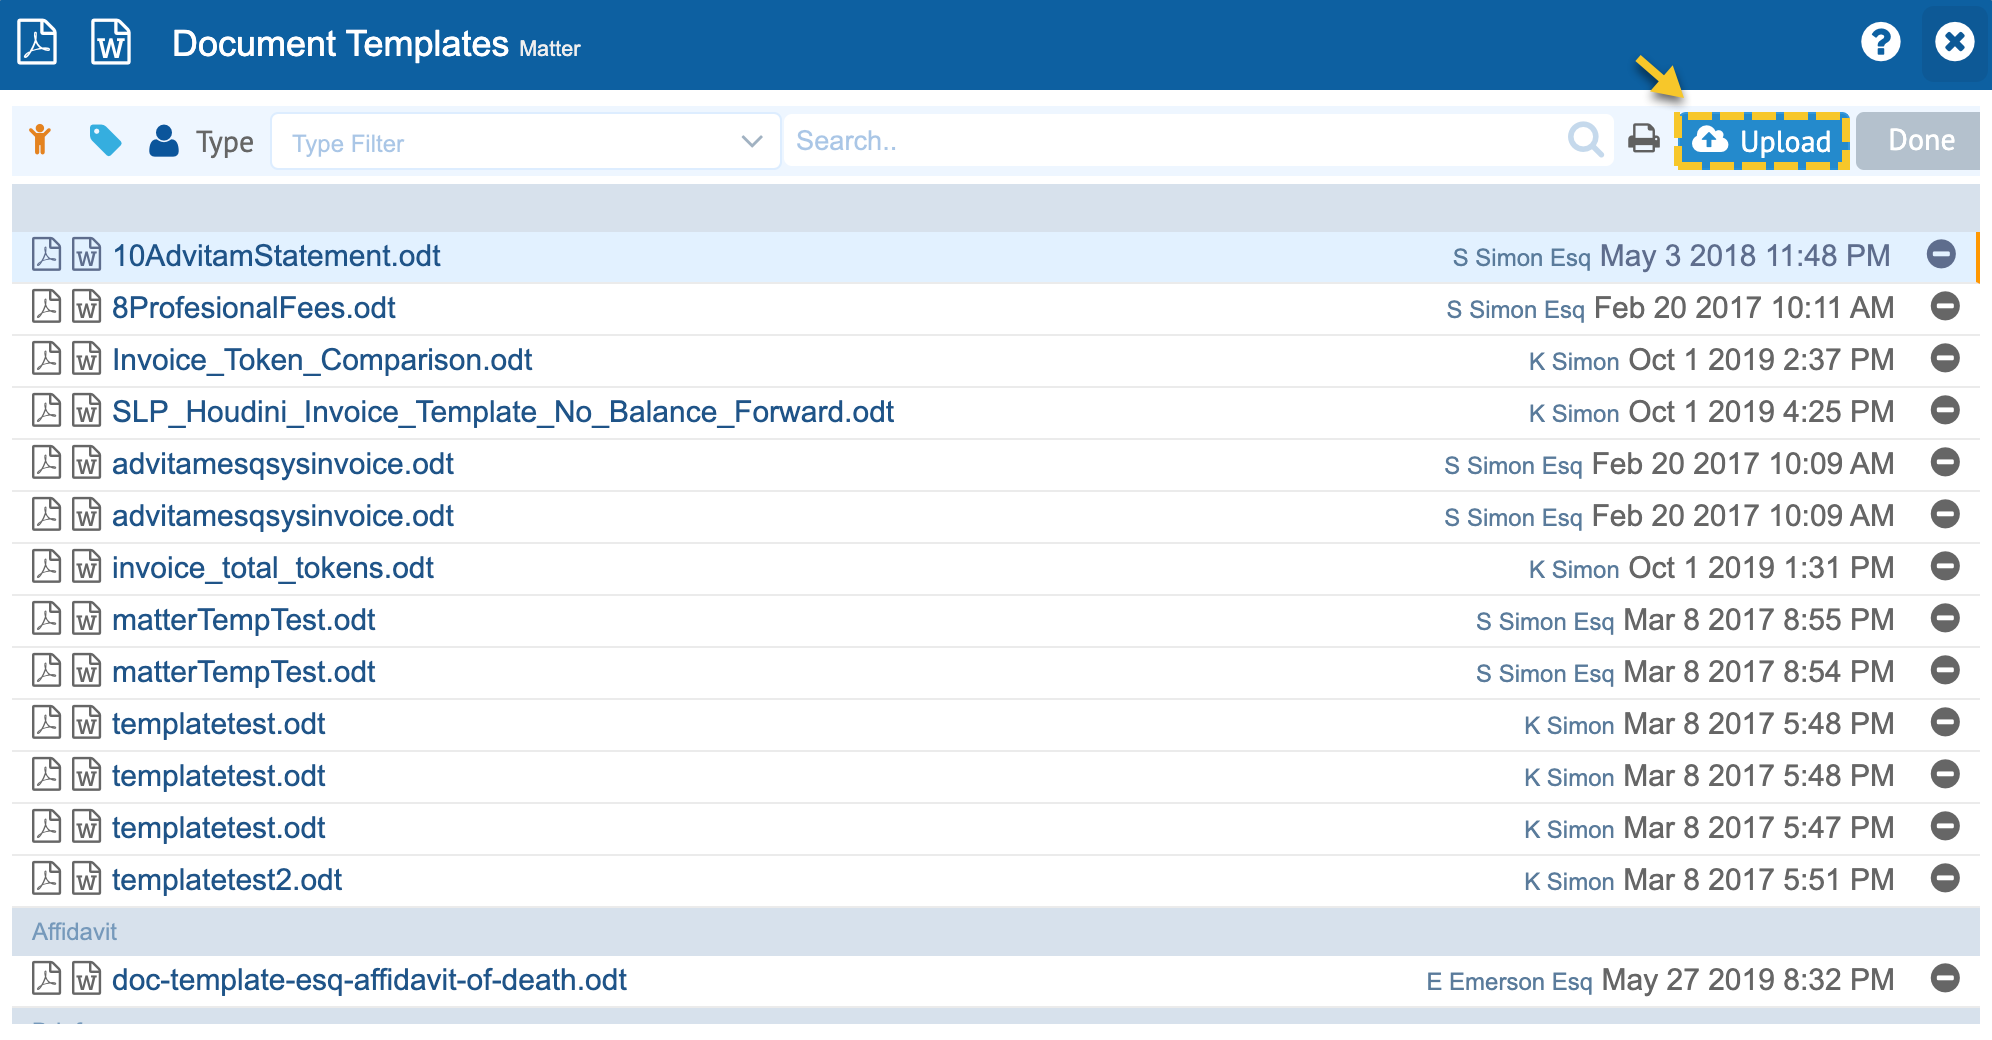
You can also upload templates in HoudiniEsq directly by clicking Generate to open the Template Panel then click the Advanced to expose the Advanced options, then click the Manage Templates button to reveal the list of templates in the system.

To add a new template to the system manually, that is, not using the free Word or WordPerfect plugins click the Upload button to place the Document Templates form into Upload Mode.
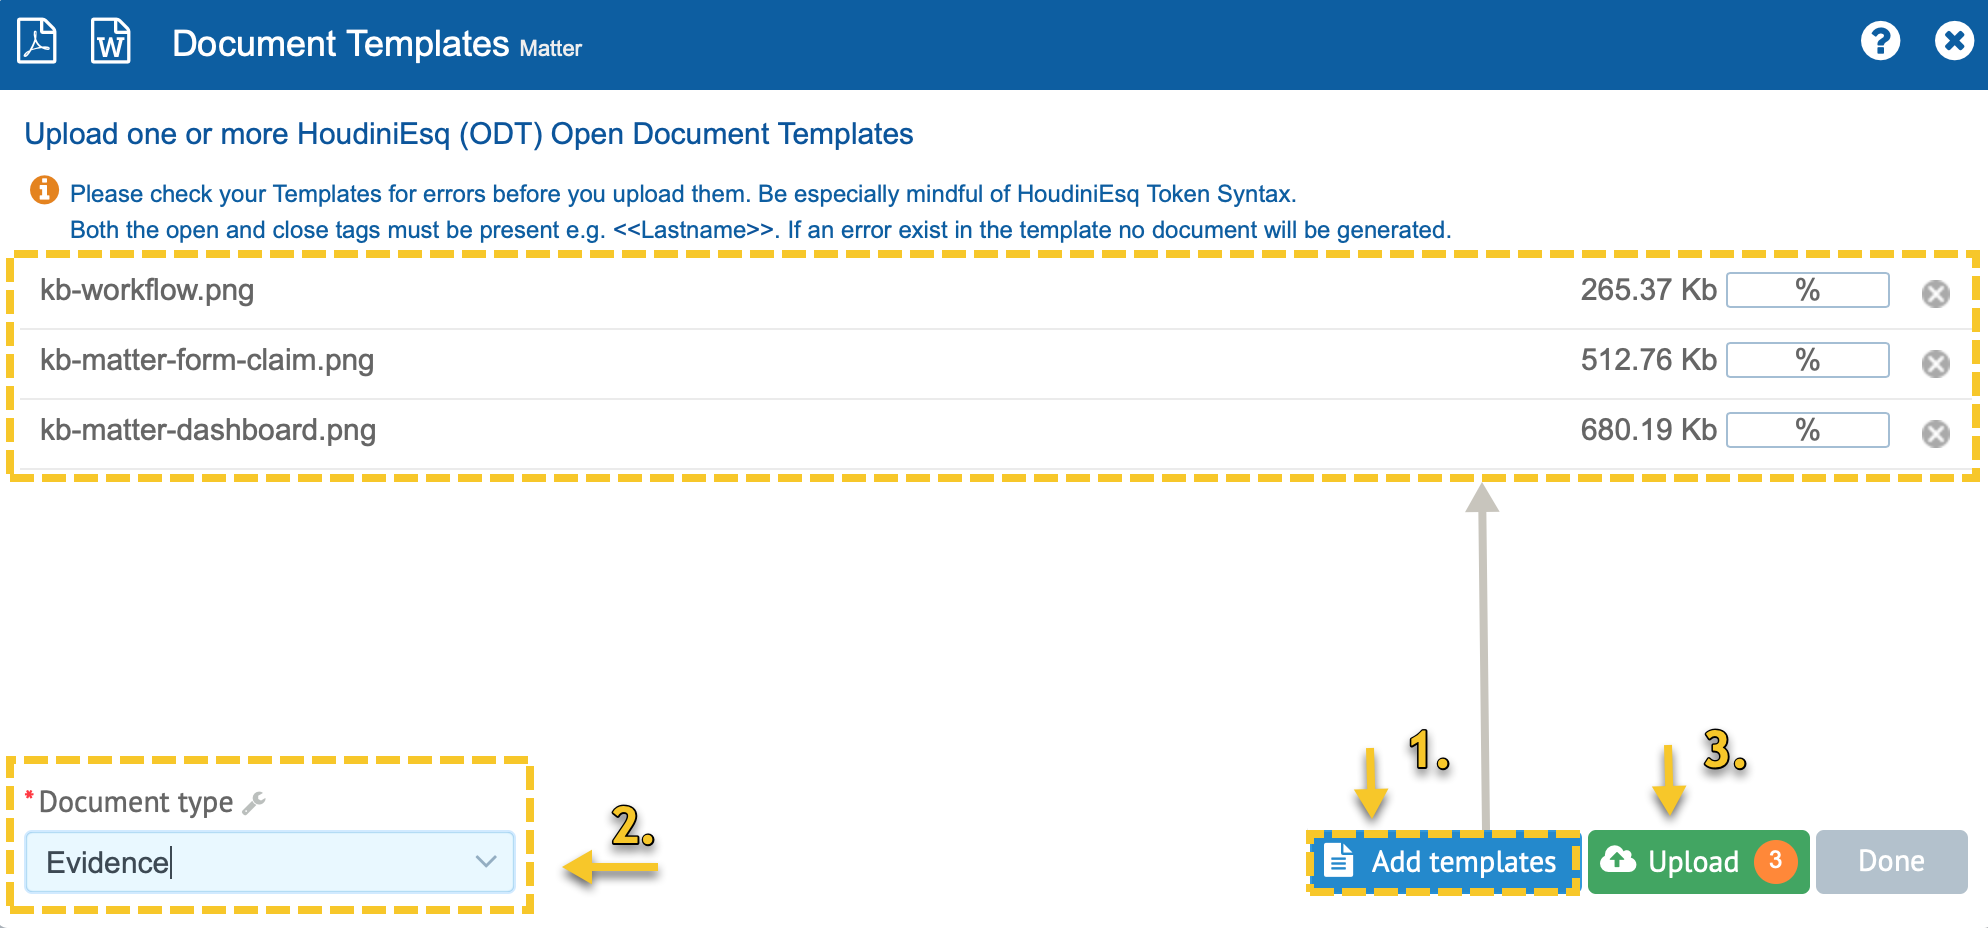
The image below depicts the Document Templates Form in Upload Mode. To upload one or more document templates do the following.
1. Click the Add templates button to make your local file selections.
2. Select a Document type from the dropdown field.
3. Click the Upload button.
Generating Documents
To generate one or more documents click the Generate button in the upper right-hand corner of the Docs Tab to open the Document Templates Panel.
Select the type of Template to list by selecting a type from the Template Type Dropdown field. Select one or more document templates.
Click the PDF or DOC button to generate the required documents.
Generated documents are listed under the Docs Tab of the open record and are full text indexed.

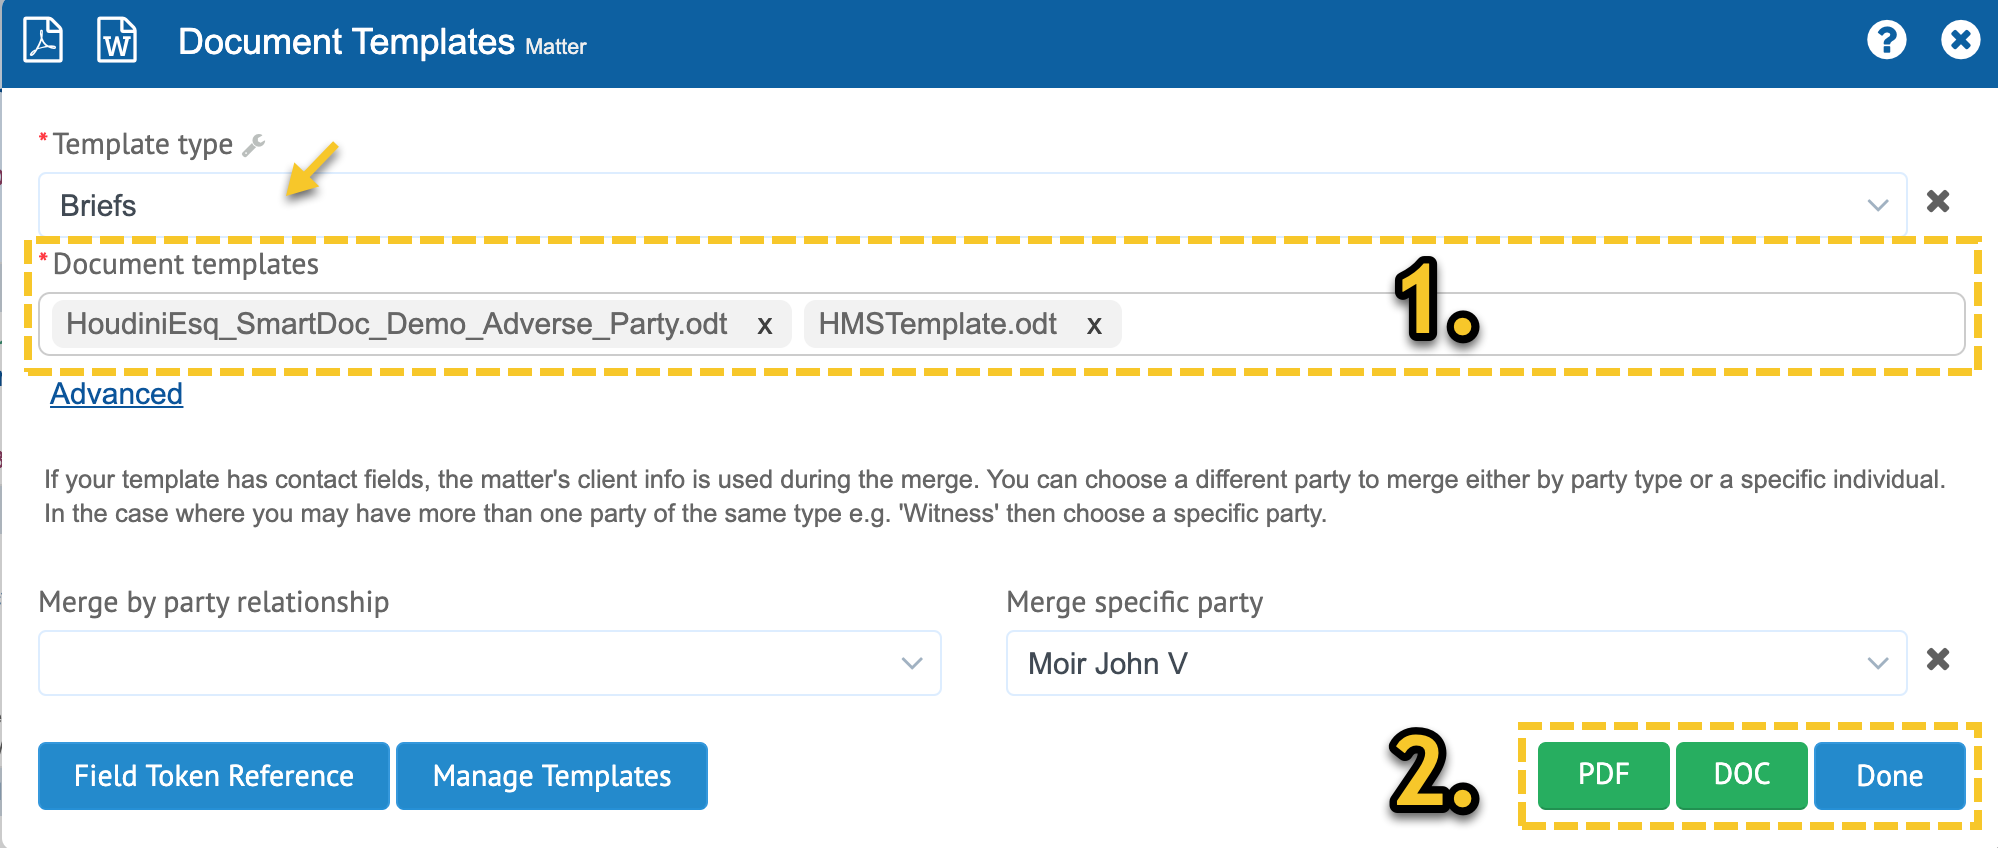
IMPORTANT The Document Templates panel does not close after generating documents. Instead, the panel stays open so you may continue to generate documents. When you are finished click the Done button to close the panel.

Did you know
Workflow can automatically generate and data merge documents when a user performs a task? For more details on HoudiniEsq Workflow Automation features see the Workflow Tutorial

Did you know
You can generate documents fom HoudiniEsq Records+ Custom Forms? For more details on Records+ and generating documents see the Records Plus Tutorial
Integration
HoudiniEsq Add-ons and Plugins
HoudiniEsq tightly integrates with Word, Office365, LibreOffice, OpenOffice, Outlook, Acrobat, and more.
All HoudiniEsq plugins are Free and can be downloaded from the HoudiniEsq Downloads page
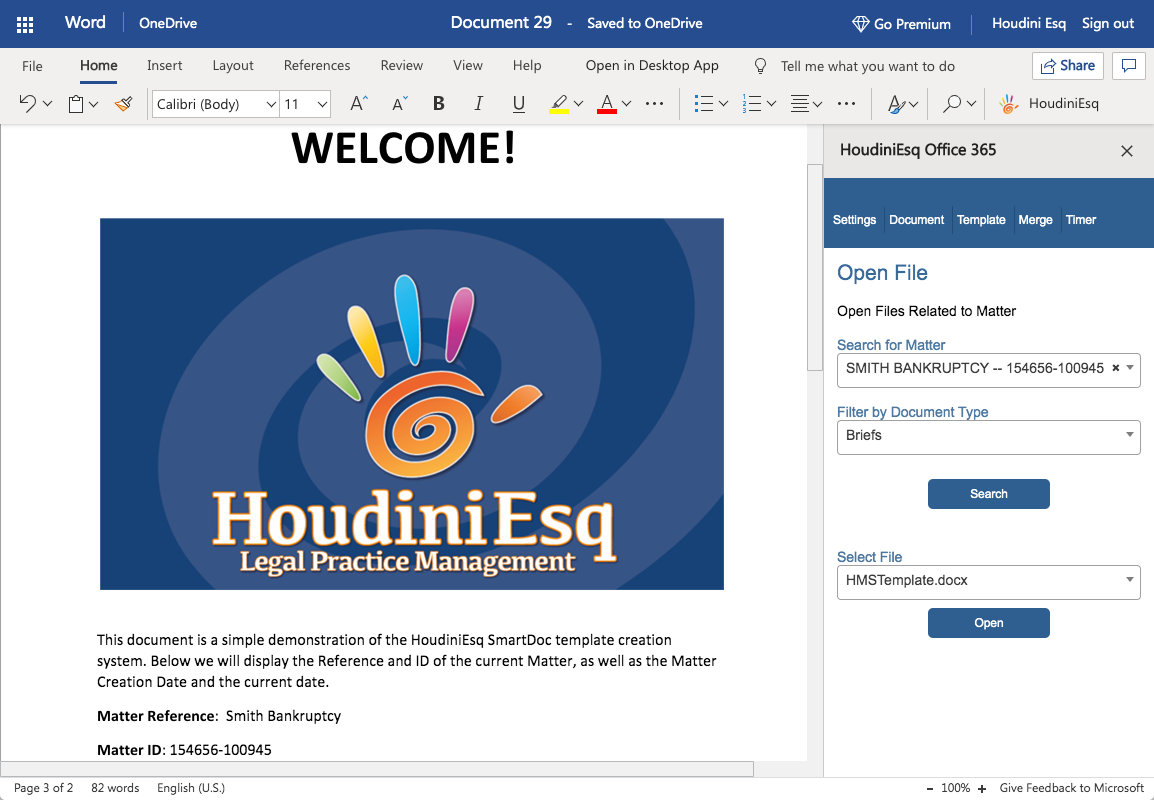
The image blow depicts Office365 and the HoudiniEsq add-on.
 |
Add-ins |
 |
MS Outlook |
Manage email, contacts, and your calendar from within Outlook and HoudiniEsq seamlessly and bidirectionally.
Supports
Email
Contacts
Calendar
Record and bill your time
Bi-directional sync your Calendar, Contacts, and Email. Bill for composing or reading an email. Link matter related correspondence to matters with a click or drag-n-drop to Matter folders right in Outlook. Mater related emails are organized in Matter folders in Outlook for you automatically. Emails and attachments are automatically full text indexed. Emails appear in the associated Matter’s email and docs tabs in HoudiniEsq.
Install
Step 1: Exit Outlook completely
Step 2: Uninstalled the add-in if it exists
Step 3: Download and run Installer for Windows
Uninstall
From the Windows control panel, add/remove programs, look for HoudiniESQForOutlook, click Remove.
 |
MS Word |
Open, edit and save documents in HoudiniEsq from within Word.
Supports
Data merges
Manage Templates
Generate documents
Full-text indexing
Record and bill your time
Install
Step 1: Exit Word completely
Step 2: Uninstalled the add-in if it exists
Step 3: Download and run Installer for Windows
Note For Mac OSX see our Office365 add-in
Uninstall
From the Windows control panel, add/remove programs, look for HoudiniESQForWord, click Remove.
 |
AcrobatPro |
Open, edit and save documents in HoudiniEsq from within Acrobat Pro. Track and bill for your time while working on PDF files effortlessly.
Install
Step 1: Exit Acrobat Pro completely
Step 2: Uninstalled the add-in if it exists
Step 3: Download and run Installer for Windows
Uninstall
From the Windows control panel, add/remove programs, look for HoudiniESQForAcrobat, click remove.
 |
WordPerfect |
Open, edit and save documents in HoudiniEsq from within WordPerfect.
Install
Step 1: Exit WordPerfect completely
Step 2: Uninstalled the add-in if it exists
Step 3: Download and run Installer for Windows
Uninstall
From the Windows control panel, add/remove programs, look for HoudiniESQForWordPerfect, click remove.
Note WordPerfect does not support the HoudiniEsq Open Document Format (ODT files).
 |
Office365 |
Open, edit and save documents in HoudiniEsq from within Office365. Track and bill for your time while you work.
Supports
Matter data merge
Generate documents
Record and bill your time
Office365 Online Install
Download from the Microsoft Store
Note This plugin works with Office365 desktop on OSX and Windows as well as Office365 online.
 |
MS Excel |
Open, edit and save documents in HoudiniEsq from within Excel.
Install
Step 1: Exit Excel completely
Step 2: Uninstalled the add-in if it exists
Step 3: Download and run Installer for Windows
Uninstall
From the Windows control panel, add/remove programs, look for HoudiniESQForExcel, click remove.
 |
QuickBooks |
This connector allows you to post to QuickBooks seamlessly from HoudiniEsq.
Supports
Client details, Invoices, Payments, Credits, Expenses, Trust deposits, Trust withdrawals, and Trust earned
No duplicate data entry and no importing or exporting to QuickBooks. If item descriptions or clients don’t exist in QuickBooks, HoudiniEsq will create them for you.
Install
Step 1: Exit QuickBooks
Step 2: Uninstalled the add-in if it exists
Step 3: Download and run Installer for Windows
Note This add-in is for QuickBooks desktop and should be installed on the QuickBooks host machine.
Uninstall
From the QuickBooks’ host machine delete the HoudiniEsq QuickBooks connector.
Admin Tutorials
How do I add or edit record types?
Creating and managing record types is easy. To edit an existing type select it from the combo and hit enter. To add a new type enter the name and hit enter.
How do I add fields to forms?
Creating and managing record types is easy. To edit an existing type select it from the combo and hit enter. To add a new type enter the name and hit enter.

"Whether in the Cloud or In-house, HoudiniEsq is the most effective way to manage a law practice."
CNBC
"A great innovation for the department. We handle over 100,000 cases annually. HoudiniEsq has made the department more effective and efficient. The department saves over $750,000 annually."
Director, Department of Fair Employment and Housing
