How Can We Help?
HoudiniEsq Field Triggers
Field Triggers
Triggers and Automated Tasks
Administrator Tutorial
Introduction
Field Triggers provide a way to have the software detect a user’s action or intent and respond by performing rule-based tasks. Field Triggers can notify staff, send alerts and system messages, generate documents, send email, and more.
Field Triggers boost productivity and can save your staff from lost time, unnecessary expenditure costs, and errors. Field Triggers are the building blocks of workflow automation. Workflow automation replaces manual processes with flexible automated, repeatable task and functions that are fast, efficient, cost-effective, and less prone to human error.
“Today, clients want more than just great lawyering. They expect their outside counsel to invest in the tools of technology to support efficiency, quality, and consistency.” J. Hectus CIO/CISO, Keesal, Young & Logan
Use case
Forms in HoudiniEsq consist of buttons, entry fields, memo fields, check-boxes, selectors, and dropdown fields. These are the application’s core fields. You can also add your own custom fields and custom forms. Most fields can be edited, re-labeled, and have triggers and rules assigned. When a user enters data into a field, selects a value, or clicks a button HoudiniEsq can perform one or more tasks.
Let’s use bankruptcy as an example. You added a key date to store the date of a 341 Hearing on the matter form. When the user enters the date it would be great if an event with alert/reminder was created at the same time. This is where HoudiniEsq field triggers come in. You can add a trigger so when a date is entered HoudiniEsq will create the associated event record and alert/reminder for you. One step that saves time and eliminates errors.

Best Practice Tip
Use a test matter for all your testing. Start by adding your firm as a contact record. Then create a matter linked to this contact record as a party to the matter. Simply search for your firm name whenever you need to try or test a feature. Don't forget to set the Matter Reference field to something unique that indicates it is a test record. Calling it "Test" works great. This provides an easy way to test functionality, settings, and your workflow without the risk of altering an important record while you experiment and test your custom configuration.
Adding Your First Field Trigger
Getting started
If you are adding a field trigger to a custom field select a record or create a new record with the correct classification so the required custom fields are loaded.
IMPORTANT Custom fields are assigned based on the classification of the form they were added to.
If you are adding a field trigger to a core field such as the Matter Reference field — the particular form or the form’s classification does not matter since core fields are the same regardless of the record’s classification. For example, adding a trigger to the Matter Reference field would be applied to all forms with a Matter Reference field.
1. Place the form into Custom Editing Mode
To add field triggers place the form into Custom Editing Mode by clicking the Wrench icon in the form’s upper right-hand corner as depicted in the image below.

2. Select a field
When the form is placed into Custom Editing Mode the Field Detail Tab is active by default.
2.1 Select the field you wish to add a trigger to.
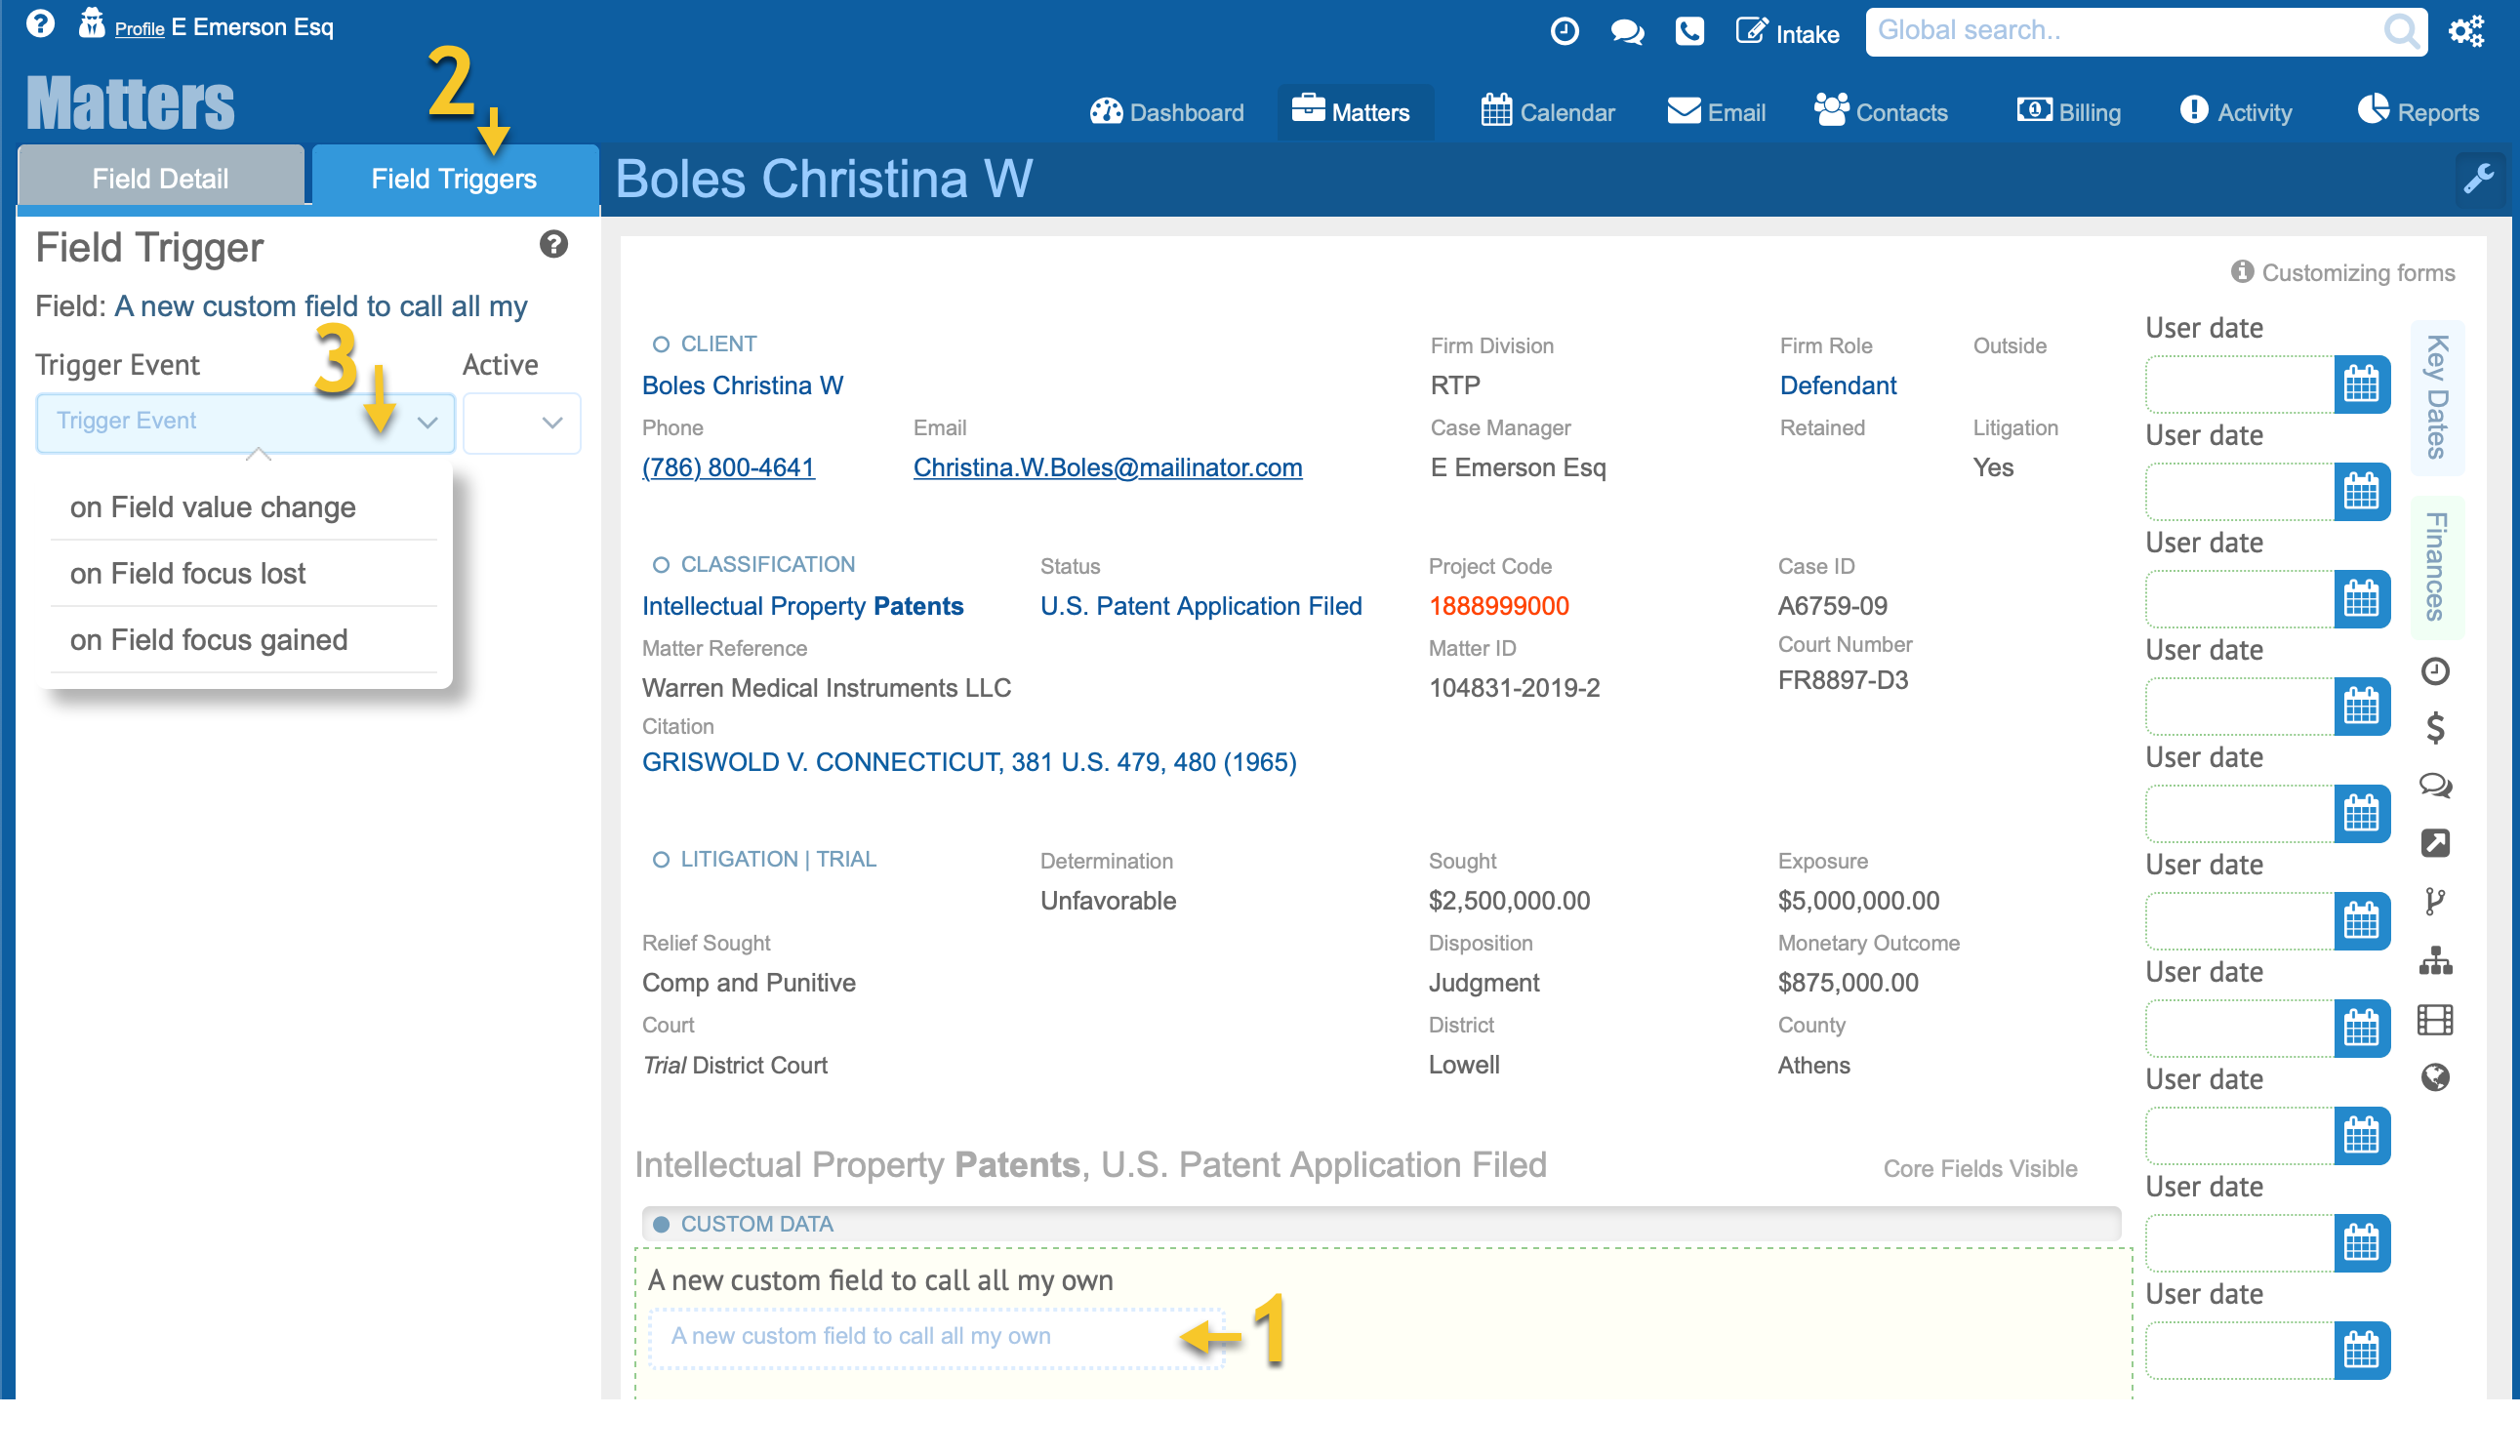
2.2 Click the Field Triggers Tab.
2.3 Select the Trigger Event that will cause the trigger to fire.
There are three events that can cause a trigger to fire, on field value change, on field focus lost, and on field focus gained.
If you would like the trigger to fire when a user changes the value in the field select the on field value change event. If you would like to have the trigger fire when the user selects the field, select on field focus gained. The on field focus lost event is fired when the user has selected a different field.
IMPORTANT Most triggers are applied to the on field value change event. The focus lost and focus gained events are special cases.
The image below depicts a matter form in Custom Editing Mode and a custom field selected. The Field Triggers tab is selected and the Trigger Event dropdown field is active.
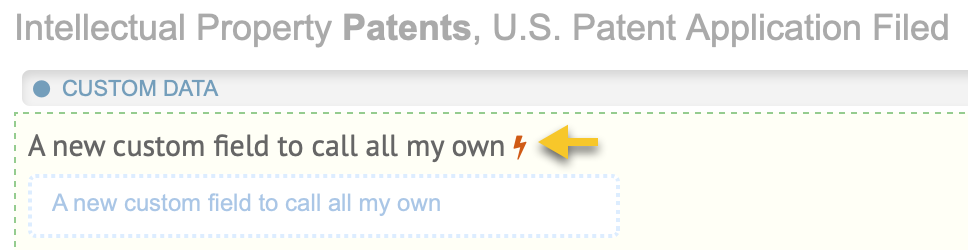
When a field has a Trigger assigned the field will indicate this by displaying a lightning bolt icon adjacent to the field’s label as depicted in this image. This is displayed only when the form is in edit mode.
3. Define the trigger actions
A Trigger Action is a task the software will perform when the trigger fires. A field trigger can have as many as nine actions assigned. The actions available are Send an Email, Generate a Document, Calendar an Event, Create a Todo, Notify Staff, Assign Group to Record, Set Field Value, Show or Hide Fields, and Display a Popup Message. For details on each of the available Actions click the appropriate link below.
Actions
Sends an email using a template you define to the assigned staff.
Creates a document form a template you define.
Creates an event with attendees, alerts and reminders you define.
Creates a todo assigned to the staff you define.
Sends a notification to staff and receive acknowledgment of receipt.
Assign a record to a group or staff.
Sets values in one or more fields. Also used to create tally fields.
Show or hides fields based on the grouo they belong to.
Displays a popup window with a message to the user.
The image below illustrates the trigger Actions area of the Field Trigger Tab.
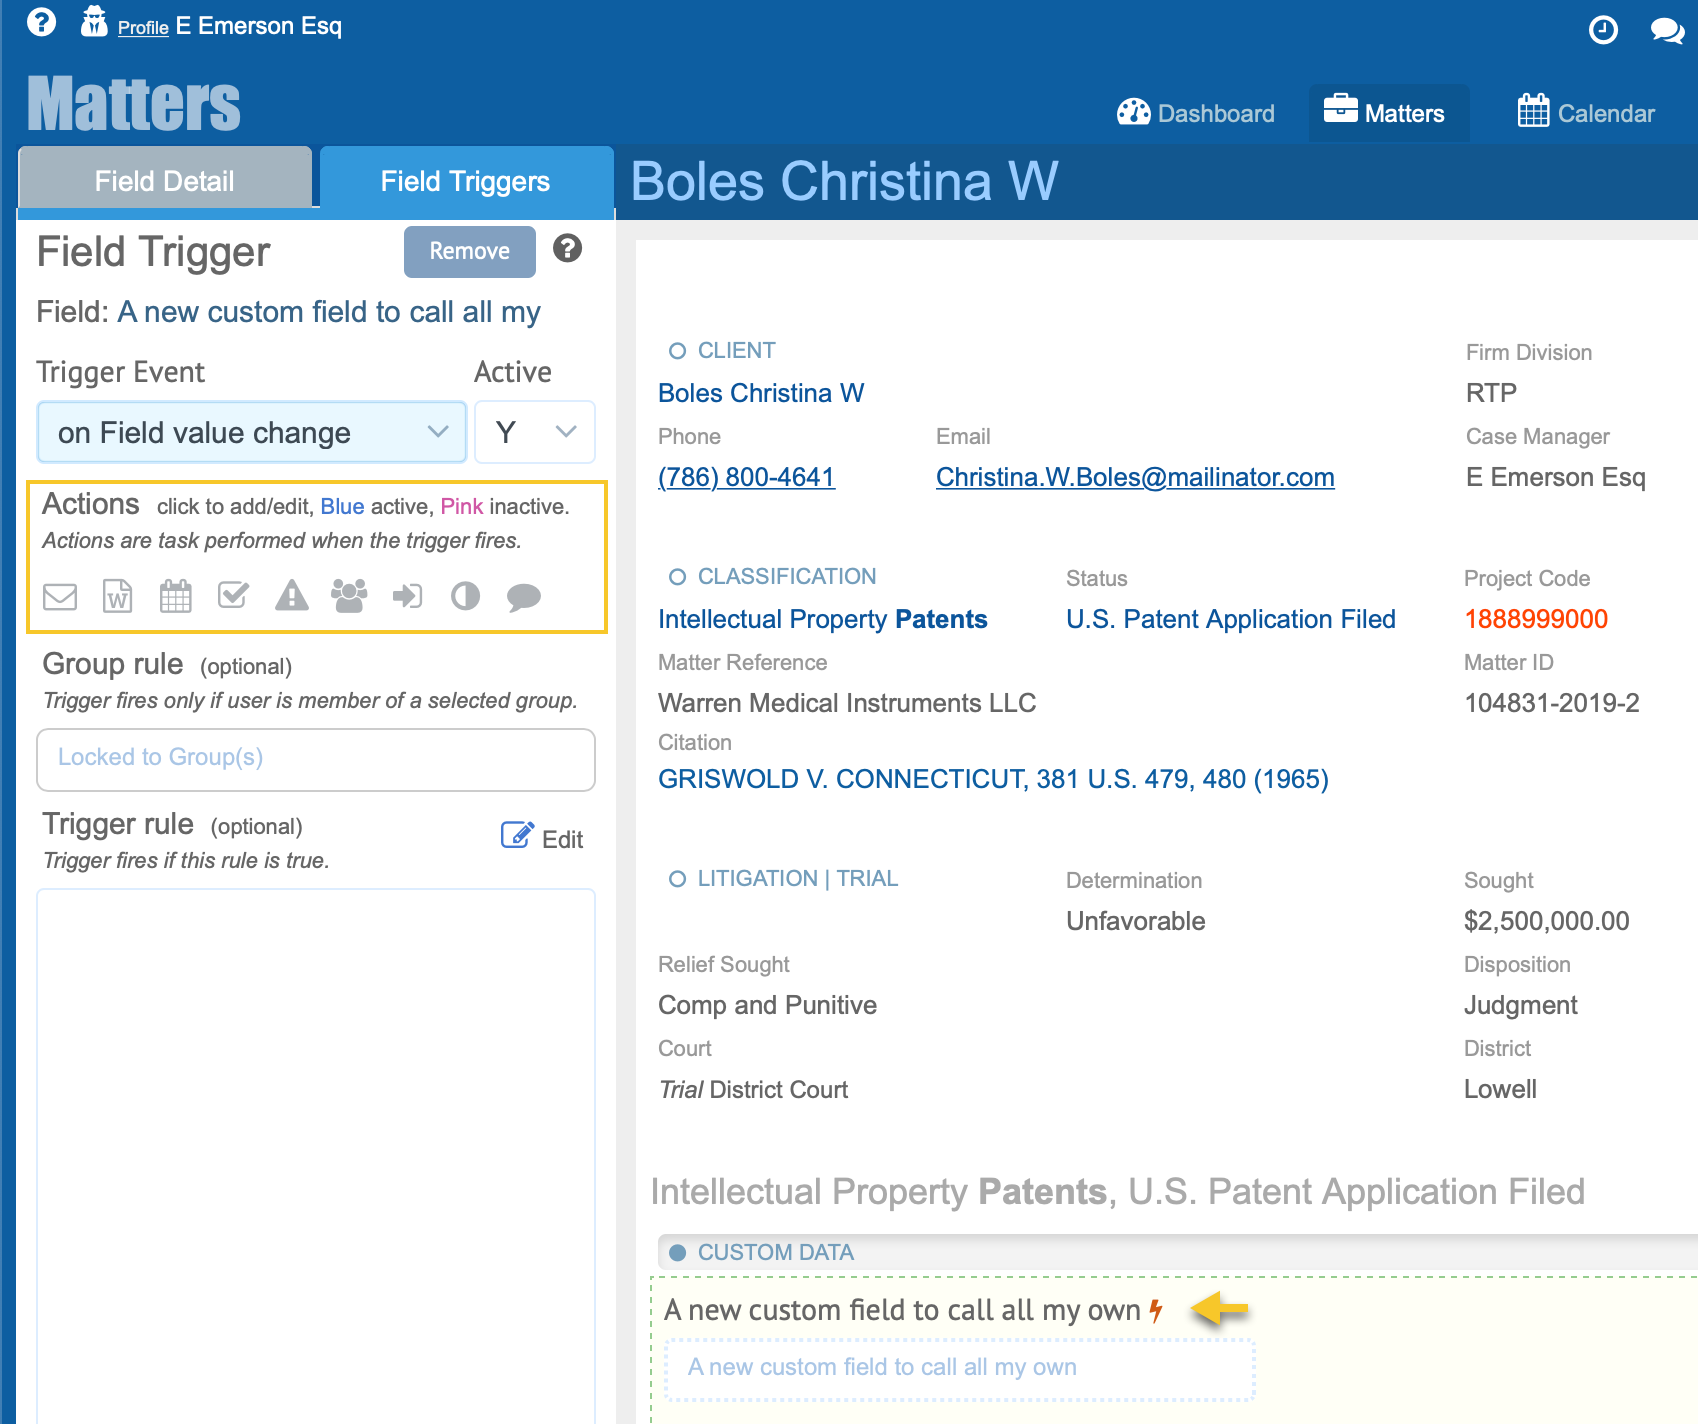
When an action is assigned to a field the icon color will change. Unassigned actions appear as grey icons. Assigned and active appear as blue icons and assigned but inactive appear as pink icons as depicted in this image.
4. Assign Groups
Use a trigger Group so it fires only for those staff that are members of the selected groups. This is very handy if you need to communicate instructions to particular staff.
Trigger Group rules are optional.
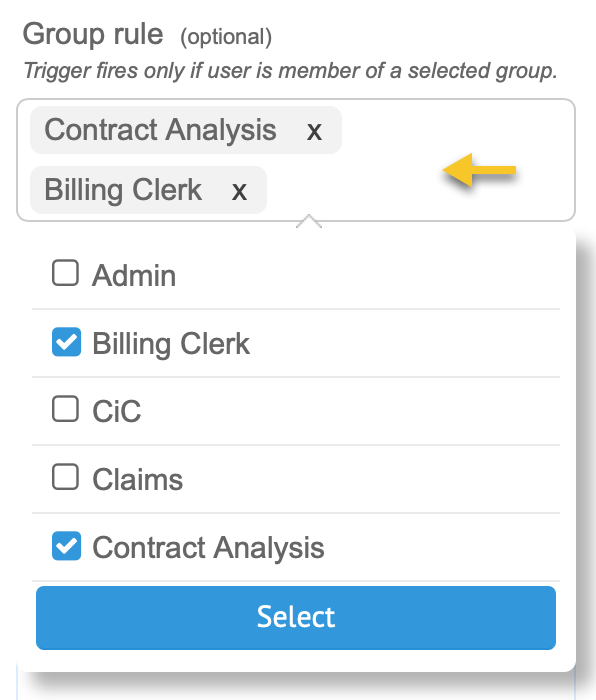
You can assign the trigger to one or more groups as this image illustrates. You can remove a group by clicking the x of the selected group in the dropdown or you can unselect the checkbox in the group list.
If no groups are listed or the required group does not exist, ask any member of the Admin group to add the required staff group. For more information on creating Staff Groups check out the Managing Staff tutorial.
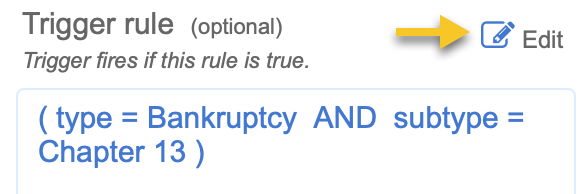
5. Define the trigger rules
Triggers are great but if they fire constantly or at the wrong time they can become a nuisance. Use a Trigger rule to limit when a trigger is valid and should fire. To get started click the Edit icon in the Trigger rule area to open the trigger rule wizard. Trigger Rules are optional but are best practice.
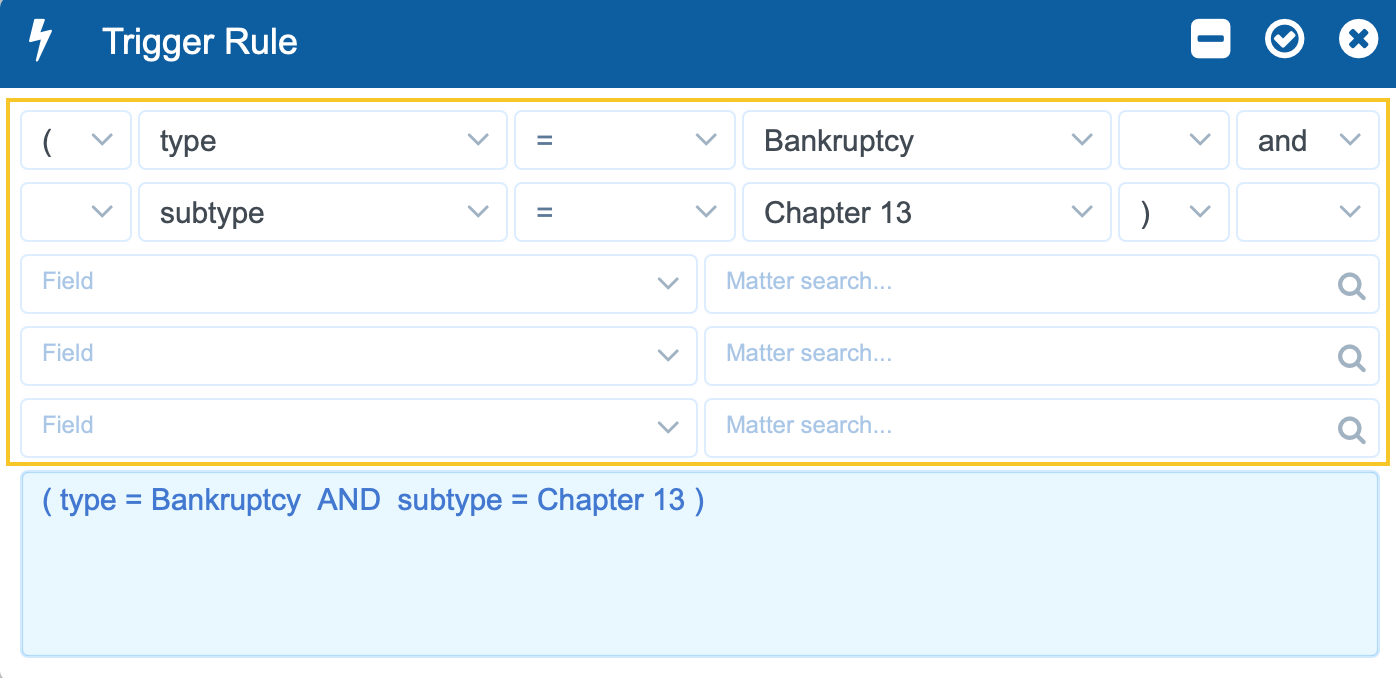
The image below depicts the Trigger rule Wizard.
Admin Tutorials

How do I create Workflow?
Triggers are a core part of workflow in HoudiniEsq. Workflows can be simple or complex and eliminate user error, increase productivity, and saves cost. To learn more check out this tutorial.
"A great innovation for the department. We handle over 100,000 cases annually. HoudiniEsq has made the department more effective and efficient. The department saves over $750,000 annually."
Director, Department of Fair Employment and Housing